Mastering Worbla Armor: 2025 Guide to Heat Forming & Painting
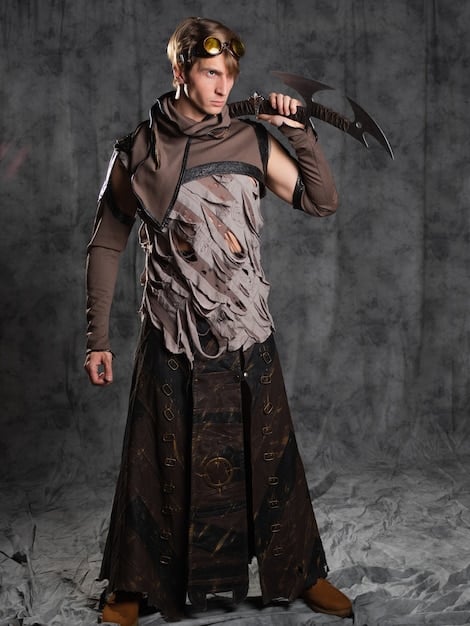
Mastering Worbla armor involves understanding its unique thermoplastic properties for forming and detailing, along with specific painting techniques to ensure durability and a professional finish for cosplay in 2025.
Embarking on the journey of creating stunning cosplay armor often leads to the versatile material known as Worbla. For cosplayers in 2025, mastering Worbla armor: a 2025 guide to heat forming and painting techniques for durable cosplay is essential for crafting pieces that are not only visually striking but also robust enough to withstand the rigors of conventions and photoshoots. This comprehensive guide will equip you with the knowledge and refined techniques necessary to transform sheets of thermoplastic into wearable art, ensuring your creations stand out with unparalleled quality and resilience.
Understanding Worbla: The Foundation of Durable Cosplay Armor
Worbla has revolutionized the cosplay crafting world since its inception, providing an accessible yet professional-grade material for armor, props, and intricate details. Its thermoplastic nature means it becomes pliable when heated and rigid when cooled, allowing for remarkable shape retention and durability once set. Before diving into the shaping process, it’s crucial to understand the different types of Worbla and their specific applications, as each variant offers unique advantages depending on the project’s demands.
Types of Worbla and Their Best Uses
Each Worbla type serves a distinct purpose, and choosing the right one significantly impacts your armor’s final look and feel. Understanding their properties is the first step towards truly mastering complex builds.
- Worbla’s Finest Art (WFA): The original and most popular choice, known for its smooth finish and self-adhesive properties when heated. Ideal for detailed, seamless surfaces.
- Worbla’s Black Art (WBA): Offers a slightly smoother texture than WFA and fewer surface irregularities, reducing the need for extensive priming. Excellent for sleek, dark builds.
- Worbla’s Mesh Art (WMA): Reinforced with a mesh, making it exceptionally strong and tear-resistant. Perfect for structural components and high-stress areas.
- Worbla’s Pearly Art (WPA): A finer grain and white color make it easier to prime and paint light colors, offering a pristine base.
Selecting the appropriate Worbla type for each component of your armor can optimize both the construction process and the final outcome, reducing labor and enhancing durability. Consider the specific demands of each piece – will it be load-bearing, or does it require a perfectly smooth finish?
Essential Tools and Workspace Setup for Worbla Crafting
Proper tools and a well-organized workspace are non-negotiable for efficient and safe Worbla crafting. A heat gun is paramount, but other tools contribute significantly to precision and ease of use. Adequately preparing your environment ensures you can focus on shaping and detailing without interruption or safety concerns.
A designated workspace, ideally with good ventilation, protection for your surfaces, and easy access to all your tools, creates an optimal crafting environment. Safety should always be a priority, especially when working with heat guns and sharp cutting tools.
Having a variety of sculpting tools, from clay sculpting kits to specialized Worbla shaping tools, will give you more control over intricate details and curvatures. Work gloves are also advisable to protect your hands from the heat during forming.
Advanced Heat Forming Techniques for Intricate Armor Shapes
The true artistry of Worbla lies in its heat-forming capabilities. With practice, you can transform flat sheets into complex, three-dimensional armor pieces that perfectly contour to the body. This requires not just heat, but an understanding of how the material behaves under different thermal conditions.
Precision Heating and Shaping for Custom Fits
Achieving a custom fit for your armor involves a delicate balance of heat application and careful manipulation. Overheating can make Worbla too pliable and difficult to control, while insufficient heat will result in an unyielding material. The goal is to reach a state where the Worbla is soft enough to mold but still holds its structure slightly.
- Even Heat Distribution: Use a heat gun to apply heat evenly across the Worbla surface. Continuous movement prevents scorching and ensures uniform malleability.
- Controlled Stretching and Draping: Gently stretch heated Worbla over forms or directly onto a body double. Guide the material, allowing it to naturally drape and conform.
- Segmented Heating: For large pieces, heat smaller sections at a time, working progressively to maintain control and precision over the overall shape.
- Strategic Cooling: Allow Worbla to cool naturally in the desired shape. For faster setting, a brief period in front of a fan can help, but avoid rapid cooling of larger pieces to prevent warping.
The key here is patience and repetition. Don’t be afraid to reheat and reshape until you achieve the perfect fit and curvature. Worbla’s reusability is one of its greatest assets, allowing for adjustments and refinements.
Creating Seams and Enhancing Structural Integrity
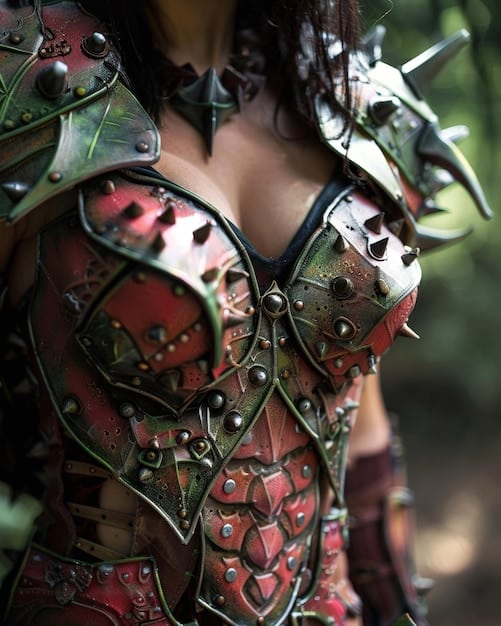
Worbla’s self-adhesive property when heated makes creating seamless joins relatively straightforward. However, for truly durable armor, understanding how to reinforce these connections and enhance the overall structural integrity of your pieces is vital. Poorly joined seams can compromise the entire project’s longevity.
Overlapping edges and heating them until they fuse creates a strong bond. For added reinforcement, especially in high-stress areas, consider embedding a thin piece of Worbla scrap between the two layers before heating and pressing them together. This “sandwich” technique significantly increases joint strength without adding noticeable bulk.
Beyond simple seams, think about the physics of your armor. How will different pieces connect? Will they support weight? Integrating hidden internal support structures, such as additional layers of Worbla’s Mesh Art, can dramatically improve stability. These reinforcements, while unseen, prevent sagging, cracking, or deformation over time.
Priming and Surface Preparation for Flawless Finishes
Without proper priming, even the most meticulous Worbla construction can look unfinished. The slightly textured surface of Worbla (especially Finest Art) requires a smooth base for paint to adhere evenly and achieve a professional appearance. This stage is critical for elevating your armor from craft project to display-quality art.
Choosing the Right Primers for Worbla
The choice of primer depends on the type of Worbla used and the desired finish. Each primer offers specific benefits, from filling in gaps to providing a super-smooth canvas for detailed painting.
- Wood Glue (PVA Glue): A classic and cost-effective option. Apply multiple thin layers, allowing each to dry completely, then sand smooth. Builds up a good base for filling slight textures.
- Gesso: Often used in art, gesso provides an excellent textured surface for paint adhesion and can fill in minor imperfections. Requires multiple coats and sanding.
- Flexbond/Flexseal: These flexible sealants are designed to move with the Worbla, preventing cracks in the primer layer as the armor flexes. Ideal for high-movement areas.
- Spray Primers (Automotive Grade): For the smoothest, most durable finish, automotive spray primers (like filler primers) can be an excellent choice. Apply in thin, even coats and sand meticulously.
Regardless of the primer chosen, the process involves patience. Multiple thin coats are always better than one thick coat, as thick coats can sag, crack, or obscure fine details. Consistent, gentle sanding between coats is what truly creates that coveted smooth surface.
Sanding and Smoothing Techniques for a Mirror Finish
Sanding Worbla after priming is tedious but absolutely essential for a professional finish. It’s the difference between armor that looks homemade and armor that looks cast from metal or stone. The goal is to eliminate all brush strokes, textures, and imperfections from the primer layer.
Start with a medium-grit sandpaper (e.g., 220-grit) to remove major imperfections, then progressively move to finer grits (e.g., 400, 600, 800-grit, or even higher) to achieve a mirror-smooth surface. Wet sanding can also be employed to reduce dust and achieve an even finer finish.
Always sand in circular motions or with the grain of the intended final texture. Pay close attention to edges and corners, as these are often where imperfections are most noticeable. Continuous inspection under good lighting will reveal areas that need more attention. The smoother the primer, the better the paint will look.
Mastering Painting Techniques for Realistic Worbla Armor
Painting Worbla armor is where your vision truly comes to life. Beyond simply applying color, advanced techniques can simulate various materials, add depth, and create a sense of realism that captivates observers. The durability of your paint job is as important as its aesthetic appeal.
Base Coat Application and Adhesion
A well-applied base coat sets the stage for all subsequent layers and effects. Proper adhesion ensures the paint won’t chip, flake, or scratch easily, protecting your investment of time and effort.
Before applying any paint, ensure your primed Worbla is completely clean and dust-free. Use a tack cloth or a damp (not wet) cloth to wipe down the surface. For plastics, an adhesion promoter can be used if you’re experiencing issues, though good priming typically negates its necessity.
Spray paints designed for plastics often work best for base coats due to their even coverage and strong adhesion. Apply several thin coats rather than one thick one. This prevents drips, allows for proper drying, and builds a more durable, even layer. Allow ample drying time between coats and before moving onto subsequent detailing.
Advanced Texturing and Weathering Effects
To replicate realistic materials like worn metal, ancient stone, or battle-damaged components, advanced texturing and weathering are indispensable. These techniques add character and believability to your Worbla armor.
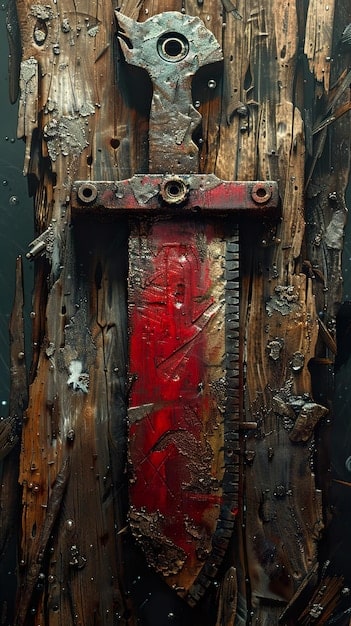
- Dry Brushing: Excellent for highlighting raised details and edges. Dip a brush lightly in paint, dab off excess, then lightly drag over the desired areas.
- Sponging/Stippling: Creates irregular, mottled textures, perfect for simulating rust, dirt, or pitted metal. Use a natural sponge or stippling brush.
- Washing/Glazing: Apply thin, diluted paint (washes) into recesses to create shadows and deepen textures. Glazes add transparent color layers for subtle shifts in tone.
- Chipping and Scratching: Use fine brushes, sponges, or even the edge of a blade (carefully!) to simulate areas where paint has chipped off or metal has been scratched.
Reference images of real-world materials are invaluable here. Study how light interacts with surfaces, where wear naturally occurs, and the subtle variations in color and texture. Practice these techniques on Worbla scraps before applying them to your finished armor pieces.
Sealing and Protecting Your Worbla Armor
The final, crucial step in painting Worbla armor is sealing it. A good clear coat protects your meticulous paint job from wear, tear, UV damage, and moisture, extending the life of your cosplay and preserving its aesthetic quality.
Clear coats come in various finishes: matte, satin, and gloss. Choose the finish that best complements your armor’s aesthetic. For example, battle-worn armor might look best with a matte or satin finish, while futuristic or magical armor might benefit from a gloss. Always test your clear coat on a scrap piece of painted Worbla to ensure compatibility with your paints and desired finish, as some clear coats can react with specific paint types.
Apply clear coats in thin, even layers, just like your base coats. Spray clear coats are generally preferred for their even application. Allow adequate drying time between coats and a full cure time before handling or wearing the armor. This final protective barrier is a small investment that pays off significantly in the long-term durability and appearance of your Worbla masterpiece.
Integrating Electronics and Lighting into Worbla Armor
For truly next-level cosplay, integrating electronics and lighting can transform static armor into a dynamic, glowing spectacle. Worbla’s inherent properties make it a surprisingly accommodating material for these additions, allowing for hidden wiring and secure placement of LEDs or other components. This is where engineering meets artistry.
Concealing Wiring and Battery Packs
The aesthetic appeal of illuminated armor is greatly diminished by visible wires or bulky battery packs. Worbla’s malleability and sandwiching capabilities are a huge advantage here. Planning for electronics from the beginning of your build is key to seamless integration.
- Channel Creation: Before the Worbla fully cools and hardens, you can press wires into the heated material, creating channels to conceal them.
- Layering: Build up layers of Worbla around wires, effectively embedding them within the armor’s structure. This is particularly effective for intricate patterns of light.
- Removable Compartments: Design small, hidden compartments using Worbla to house battery packs and control switches, making them accessible for charging or replacement without disrupting the armor’s exterior.
Consider using thin-gauge wires that are less bulky and easier to conceal. Labeling wires during the installation process can save immense frustration during troubleshooting. Always ensure that connections are secure and insulated to prevent shorts, especially in high-flex areas.
LED Strips and Diffusers for Even Illumination
For a soft, even glow rather than visible bright spots, diffusers are crucial. LED strips offer versatility in shape and color, making them ideal for Worbla armor.
Flexible LED strips can be molded with the Worbla or adhered to the interior surfaces. For a diffused effect, consider using translucent Worbla’s Pearly Art over the LEDs, or creating a hollow Worbla channel lined with a thin, milky plastic sheet. Sanding the plastic on one side can also help with diffusion.
Experiment with different types of LEDs (e.g., addressable RGB strips for color-changing effects) and power sources (e.g., small, rechargeable LiPo batteries) to achieve the desired brightness and duration. Always test your circuit before fully sealing it into the armor, ensuring all lights function as intended.
Maintenance and Storage Tips for Longevity
Your Worbla armor is an investment of time and creativity. Proper maintenance and storage are crucial to ensure its longevity, preventing damage, dust buildup, and material degradation. Treating your armor with care will keep it pristine for many conventions to come.
Cleaning and Minor Repairs
After a convention or photoshoot, your armor may inevitably accumulate dust, dirt, or even smudges. Regular, gentle cleaning is recommended to prevent grime from becoming ingrained. For minor scuffs or cracks, Worbla’s reusability means minor repairs are often quite straightforward.
- Dusting: Use a soft, dry cloth or a microfiber duster to remove surface dust. For crevices, an air duster can be effective.
- Spot Cleaning: For smudges or light dirt, a slightly damp cloth (using only water or a very mild, non-abrasive soap) can be used. Avoid harsh chemicals as they can damage paint or the Worbla itself.
- Addressing Scratches/Scuffs: Minor scratches on the paint can sometimes be touched up with matching paint. Deeper scuffs might require light sanding, repainting, and resealing of the affected area.
- Repairing Cracks: For small cracks in the Worbla itself, gently heat the area with a heat gun to reunite the material. For larger cracks, a small patch of Worbla can be heated and molded over the crack, blending it into the surrounding area, followed by priming and painting.
Always test any cleaning solution or repair method on an inconspicuous area first. Timely minor repairs can prevent small issues from escalating into major damage, preserving the integrity and appearance of your armor.
Optimal Storage Solutions for Worbla Cosplay
How you store your Worbla armor significantly impacts its lifespan. Improper storage can lead to warping, paint damage, or structural issues. The goal is to keep it in a cool, dry place where it’s protected from physical stress and environmental factors.
Avoid storing Worbla armor in direct sunlight or in areas with extreme temperature fluctuations (e.g., attics, uninsulated garages). Excessive heat can cause the Worbla to soften and warp under its own weight or external pressure. Conversely, extreme cold can make it brittle and more prone to cracking if handled roughly.
Consider individual garment bags or large, sturdy boxes for each major armor piece to prevent scratching or rubbing. Padded hangers or custom-built stands can help maintain the armor’s shape. For intricate pieces, fill hollow areas with crumpled acid-free tissue paper to provide internal support. Proper storage ensures your hard work remains pristine, ready for its next grand appearance.
| Key Point | Brief Description |
|---|---|
| 🎨 Material Choice | Select Worbla type strategically (e.g., Finest Art for details, Mesh Art for strength). |
| 🔥 Heat Forming | Utilize even heat, controlled stretching, and proper cooling for custom, durable shapes. |
| 🖌️ Priming & Painting | Thorough priming and layering techniques are crucial for smooth, realistic finishes. |
| 🛡️ Protection & Storage | Seal finished armor and store it properly to prevent damage and extend its lifespan. |
Frequently Asked Questions About Worbla Armor
For beginners, Worbla’s Finest Art (WFA) is highly recommended. Its self-adhesive nature and forgiving malleability make it easy to work with, even if you make mistakes. It reheats easily for adjustments and allows for seamless joins, providing a great starting point to learn basic heat forming and sculpting.
To prevent warping, ensure even heating and allow the Worbla to cool completely in its desired shape. Avoid rapid cooling, which can introduce stress. For large or complex pieces, gently hold or clamp the Worbla in form until it fully sets. Reinforcing with internal supports can also boost stability.
For a super smooth finish, automotive filler primers or high-quality gesso are excellent choices. Apply multiple thin coats, allowing each to dry thoroughly, and meticulously sand between each coat with progressively finer grits of sandpaper (e.g., 220, 400, 600, 800). This process fills Worbla’s natural texture.
While you can, it’s not recommended to paint Worbla directly with acrylics without priming. Worbla’s slightly textured surface can lead to uneven paint application and poor adhesion. Priming creates a smooth, uniform surface that allows acrylics to adhere better, look more vibrant, and resist chipping and scratching over time.
Store Worbla armor in a cool, dry place away from direct sunlight or extreme temperatures. Use garment bags or sturdy boxes to protect individual pieces from dust and physical damage. For intricate components, consider stuffing them with acid-free tissue paper or using custom stands to help maintain their shape and prevent warping.
Conclusion
Mastering Worbla armor is an iterative process that blends creativity with technical skill. From understanding the nuances of different Worbla types to executing precise heat-forming, meticulous priming, and artistic painting, each step contributes to the ultimate durability and visual impact of your cosplay. By refining these techniques, incorporating strategic electronic elements, and committing to proper maintenance, you can consistently produce show-stopping armor pieces that not only realize your design visions but also endure the excitement and demands of the cosplay world for years to come. Your journey into Worbla crafting is an evolving one, promising endless possibilities for innovation and self-expression.

