Master Realistic Cosplay Prop Painting: Metal & Weathering
Advanced cosplay prop painting involves specialized techniques to achieve realistic metal and weathering effects, enhancing the authenticity and visual impact of costumes.
Ready to take your cosplay props to the next level? Mastering advanced cosplay prop painting: achieving realistic metal and weathering effects is key to creating truly believable and impressive costumes. We’ll guide you through the techniques used by professional prop makers to bring your creations to life.
Understanding the Basics of Prop Painting
Before diving into advanced techniques, it’s crucial to have a solid grasp of the fundamentals. Proper preparation, priming, and base coating are essential for achieving professional-looking results. Let’s explore these foundational steps.
Surface Preparation: The Key to Success
The quality of your paint job is heavily reliant on how well you prepare the surface of your prop. This includes removing imperfections and ensuring proper adhesion for the paint.
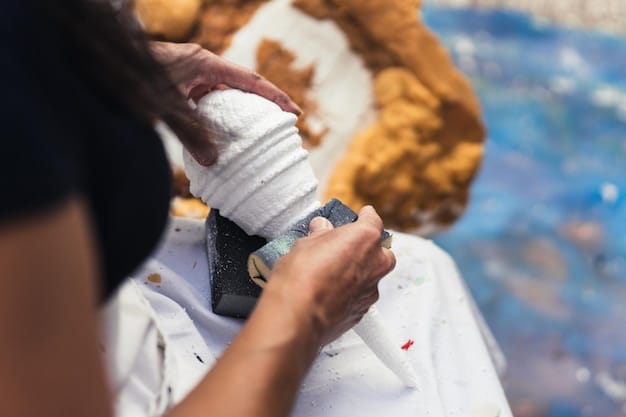
- Sanding: Use progressively finer grits of sandpaper to smooth out any rough spots or unevenness on the prop’s surface.
- Cleaning: Thoroughly clean the prop with a degreaser or isopropyl alcohol to remove any dust, oils, or contaminants that could interfere with paint adhesion.
- Filling: For 3D-printed props or those with noticeable seams, use filler or spot putty to fill in gaps and create a seamless surface. Sand smooth after the filler has dried.
Priming for a Lasting Finish
Priming is an essential step that creates a uniform base for your paint, improves adhesion, and helps to bring out the true color of your top coats.
- Primer Selection: Choose a primer that is compatible with both the prop material and the type of paint you intend to use. Options include acrylic, enamel, and lacquer-based primers.
- Application Technique: Apply the primer in thin, even coats to avoid drips and runs. Allow each coat to dry completely before applying the next.
- Sanding the Primer: After the primer has fully cured, lightly sand it with fine-grit sandpaper to create an even smoother surface for painting.
Mastering surface preparation and priming is the key to unlocking advanced painting techniques. These steps lay the groundwork for amazing metal and weathering effects on your cosplay props.
Achieving Realistic Metal Effects
Creating a convincing metal finish involves more than just using metallic paint. It requires layering techniques, strategic weathering, and a keen eye for detail. Here’s how to create those effects.
Choosing the Right Metallic Paints
The range of metallic paints available can be overwhelming, but selecting the right ones is crucial for achieving the desired metal look. Consider the type of metal you want to replicate and choose paints accordingly.
- Acrylic Metallics: Versatile and easy to work with, acrylic metallic paints are great for beginners. They can be applied with brushes or airbrushes and are available in a wide range of colors.
- Enamel Metallics: These paints provide a more durable and realistic metal finish than acrylics. However, they require proper ventilation and can be more difficult to clean up.
- Lacquer Metallics: Offering the most realistic metal look, lacquer metallic paints are often used by professionals. They require specialized equipment, such as an airbrush, and should be used in a well-ventilated area.
Layering and Highlighting
Creating depth and realism in your metal finish involves layering different shades and highlighting key areas. This technique mimics how light interacts with real metal surfaces.
- Base Coat: Start with a base coat of metallic paint that closely matches the overall color of the metal you’re trying to replicate.
- Shadowing: Use a darker shade of metallic paint or a black wash to create shadows in recessed areas of the prop. This adds depth and dimension.
- Highlighting: Apply a lighter shade of metallic paint to raised areas and edges to simulate highlights. This technique makes the metal appear more reflective.
Dry Brushing for Texture
Dry brushing is a technique where you apply a small amount of paint to a brush, wipe off most of it, and then lightly brush the surface of the prop. This creates a subtle texture that mimics the natural imperfections of metal.
- Brush Selection: Use a stiff-bristled brush for dry brushing. An old, worn brush works best.
- Paint Application: Dip the brush into the metallic paint, then wipe off almost all of it onto a paper towel.
- Dry Brushing Technique: Lightly brush the surface of the prop with the almost-dry brush. The paint will catch on the raised areas, creating a subtle texture.
By mastering these techniques, you can create incredibly realistic metal effects on your cosplay props, making them stand out from the crowd.
Mastering Weathering Techniques
Weathering adds character and realism to your cosplay props by simulating the effects of time, wear, and environmental exposure. It’s an essential skill for any prop maker. Here’s a breakdown of those skills.
Understanding Weathering Effects
Before you start weathering your prop, it’s important to understand the different types of weathering effects and how they can be achieved. This will help you create a more realistic and believable look.
- Rust: Simulates the corrosion of iron or steel. Can be achieved with rust-colored paints, washes, and weathering powders.
- Dirt and Grime: Represents the accumulation of dirt, dust, and other debris. Can be created with washes, dry brushing, and weathering powders.
- Scratches and Wear: Mimics the wear and tear of regular use. Can be achieved with sanding, scraping, and dry brushing.
Applying Washes for Depth
Washes are thinned-down paints or inks that are applied to the surface of the prop to add depth and highlight details. They are particularly effective for simulating dirt, grime, and rust.
- Wash Preparation: Dilute your chosen paint or ink with water or a weathering thinner. The consistency should be similar to that of a stain.
- Application Technique: Apply the wash liberally to the surface of the prop, making sure to get it into all the crevices and details.
- Wiping Away Excess: Use a clean cloth or sponge to wipe away the excess wash from the raised areas of the prop, leaving it in the recessed areas.
Using Weathering Powders
Weathering powders are finely ground pigments that can be applied to the surface of the prop to create various weathering effects. They are particularly useful for simulating rust, dirt, and dust.
- Powder Selection: Choose weathering powders that match the desired effect. Options include rust, dirt, dust, and soot.
- Application Technique: Apply the weathering powder to the surface of the prop with a soft brush or cotton swab.
- Sealing the Powder: After applying the weathering powder, seal it with a clear coat of sealant to prevent it from rubbing off.
By utilizing weathering techniques, you can transform your brand-new props into realistic, battle-worn pieces that tell a compelling story.
Creating Battle Damage
To simulate the battle damage you need to make sure you prop looks like it has been used, and abused. There are some simple technqiues that can make your prop look fantastic.
- Chipping: Use a hobby knife or sandpaper to carefully chip away small pieces of paint, revealing the underlying layers and creating a worn look.
- Scratches: Create scratches by dragging a sharp object, such as a needle or pin, across the surface of the prop. Vary the depth and direction of the scratches for a more realistic effect.
- Dents and Dings: Simulate dents and dings by lightly tapping the surface of the prop with a hammer or other blunt object. Be careful not to damage the prop excessively.
Use these techniques to create fantastic looking and realistic battle damage on your props.
Advanced Painting Tools and Materials
Having the right tools and materials can significantly enhance your prop painting capabilities. Investing in quality tools and expanding your knowledge of different materials can open up new possibilities for your projects.
Airbrushes vs. Traditional Brushes
While traditional brushes are great for detail work and applying washes, airbrushes offer a superior level of control and precision for applying smooth, even coats of paint.
- Airbrush Advantages: Airbrushes allow you to create smooth gradients, apply thin layers of paint, and achieve a more professional-looking finish.
- Brush Advantages: Traditional brushes are more affordable and easier to clean than airbrushes. They are also great for applying washes, dry brushing, and other weathering techniques.
Expanding Your Paint Palette
Having a wide range of paints at your disposal allows you to create more complex and nuanced finishes. Experiment with different types of paints, such as acrylics, enamels, and lacquers, to see which ones work best for your projects.
- Specialty Paints: Consider adding specialty paints, such as color-shifting paints, glow-in-the-dark paints, and textured paints, to your palette. These paints can add unique and eye-catching effects to your props.
- Mixing Your Own Colors: Learn how to mix your own colors to create custom shades that perfectly match your vision. A color wheel can be a valuable tool for understanding color relationships and mixing your own paints.
Sourcing Quality Materials
The materials you use to build your props can also affect the quality of your paint job. Choose high-quality materials that are durable, easy to work with, and compatible with the paints and techniques you plan to use.
- 3D Printing Filaments: If you’re using a 3D printer to create your props, experiment with different types of filaments to find the ones that offer the best surface finish and durability.
- Foam Clay: A lightweight, pliable material that can be easily shaped and molded. It’s great for creating organic shapes and details.
With a well-equipped toolkit and a willingness to experiment, you can push the boundaries of prop painting and create stunning, lifelike finishes.
Safety Precautions and Best Practices
Prop painting involves working with potentially hazardous materials, so it’s important to prioritize safety and follow best practices to protect yourself and others. Here’s a guide to those practices.
Ventilation is Key
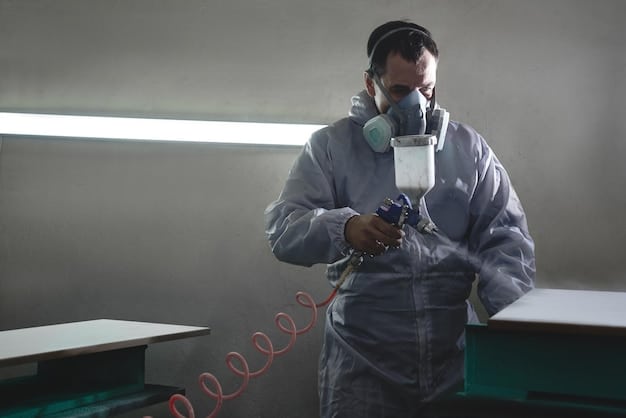
Many paints, primers, and sealants release harmful fumes, so it’s essential to work in a well-ventilated area. If possible, work outdoors or in a room with an exhaust fan. If you’re working indoors, open windows and use a fan to circulate the air.
Protective Gear
Wear appropriate protective gear to prevent exposure to harmful chemicals. This includes:
- Respirator: A respirator will protect you from inhaling harmful fumes. Choose a respirator that is specifically designed for use with paints and solvents.
- Gloves: Wear gloves to protect your hands from paint and solvents. Nitrile gloves are a good option.
- Eye Protection: Wear safety glasses or goggles to protect your eyes from splashes and fumes.
Proper Disposal of Materials
Dispose of used paints, solvents, and other materials properly to prevent environmental contamination. Check with your local waste management authority for guidelines on proper disposal.
By following these safety precautions, you can enjoy prop painting while minimizing the risks to your health and the environment.
Inspiration and Resources for Prop Painting
To master advanced cosplay prop painting: achieving realistic metal and weathering effects, it can be helpful to draw inspiration from experts and sources. Here’s how to do just that.
Online Tutorials and Workshops
There are a wealth of online tutorials and workshops available that can teach you everything from basic prop painting techniques to advanced effects. YouTube, Patreon, and Skillshare are great places to find these resources.
- Cosplay Communities: Online forums, groups, and social media communities dedicated to both the art of cosplay and making of cosplay props provide an opportunity to connect with fellow prop makers, share tips and tricks, and get feedback on your work.
- Books and Magazines: If you prefer learning from print resources, there are many books and magazines available that cover prop making and painting techniques.
Analyzing Real-World References
Studying real-world references, such as photographs of metal objects, weathered surfaces, and battle-damaged vehicles, can help you create more realistic and believable effects on your props. Pay attention to the colors, textures, and patterns of wear and tear.
By exploring these resources, you can continue to learn and improve your prop painting skills, pushing the boundaries of what’s possible and creating truly impressive cosplay props.
Conclusion
By using these techniques, you can create high-quality and realistic looking props for cosplay, or anything else you can imagine. It takes time to produce these fantastic looking props, but with enough effort you can recreate them. So go forth, and make as realistic looking props as possible.
| Key Point | Brief Description |
|---|---|
| 🎨 Surface Prep | Sanding, cleaning, and priming are essential for a smooth paint job. |
| ✨ Metal Effects | Layer metallic paints and use dry brushing for realistic metal finishes. |
| ⚙️ Weathering | Apply washes and weathering powders to simulate wear and tear. |
| 🛡️ Safety | Ensure ventilation and protective gear when painting props. |
FAQ
▼
Start by sanding the surface to remove imperfections, then clean it thoroughly with a degreaser to ensure proper paint adhesion.
▼
Layer different shades of metallic paint, and use dry brushing techniques to mimic the natural imperfections of metal.
▼
Always work in a well-ventilated area and wear protective gear, such as a respirator, gloves, and eye protection.
▼
Apply washes for depth and use weathering powders to simulate rust, dirt, and dust. Also, create scratches and dents for a battle-worn appearance.
▼
An airbrush, a variety of paintbrushes, sanding tools, and weathering powders are essential for achieving realistic and detailed prop finishes.
Conclusion
Mastering advanced cosplay prop painting: achieving realistic metal and weathering effects requires dedication and practice, but the results are well worth the effort. Armed with these techniques and tools, you’re now equipped to create stunning, lifelike props that will elevate your cosplay to new heights. So go forth, experiment, and transform your creative visions into reality!


