Creating Realistic Cosplay Blood: A Step-by-Step Tutorial
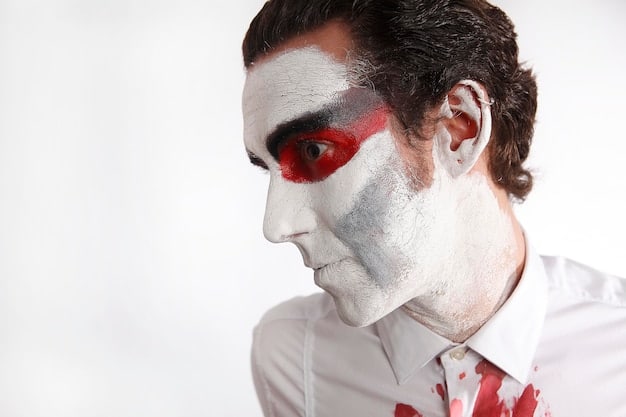
Creating realistic cosplay blood and gore effects involves using simple ingredients and techniques to achieve convincing results for costumes and performances.
Ready to take your cosplay to the next level? This step-by-step tutorial will show you how to create incredibly realistic blood and gore effects for your costumes, making your character come to life like never before. Learn the secrets of achieving believable, dramatic looks with accessible materials and easy-to-follow techniques.
Introduction to Cosplay Blood and Gore Effects
Cosplay is more than just dressing up; it’s an art form. The details can make or break a character’s believability. One of the most impactful elements to master is creating realistic blood and gore effects.
Whether you’re aiming for a horrifying zombie, a battle-scarred warrior, or a victim of a spooky accident, knowing how to create convincing blood and gore effects can add depth and drama to your portrayal. This guide will provide you with a comprehensive, step-by-step tutorial on achieving those effects, all while keeping safety and realism in mind.
Gathering Your Materials for Realistic Effects
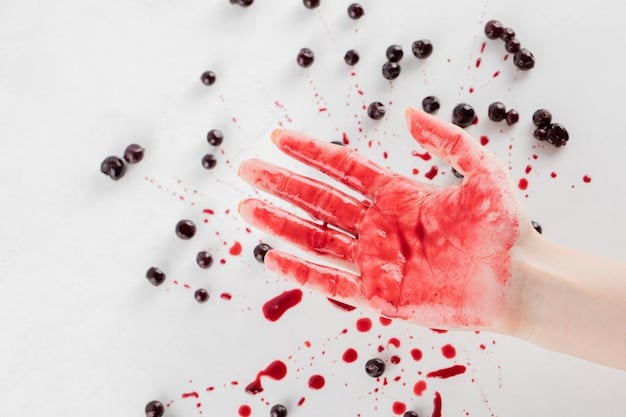
Before diving into the methods, it’s crucial to gather all the necessary materials. Having everything at hand will make the process smoother and more efficient. The key is to use non-toxic ingredients and remember that safety always comes first.
Essential Blood Ingredients
The base of most realistic cosplay blood recipes involves a combination of ingredients that create the right color and consistency.
- Corn syrup: This provides a thick, viscous base that mimics the texture of real blood.
- Food coloring: Red food coloring is essential, but adding a touch of blue or green can deepen the color and make it appear more lifelike.
- Water: Used to thin the mixture to the desired consistency, making it easier to apply and drip.
- Cocoa powder or coffee grounds (optional): These can add a brownish tint and subtle texture to simulate dried blood.
Additional Gore Supplies
For more elaborate, gory effects, you’ll need extra materials that are either on hand, or widely avaialble. Craft stores and pharmacies will be your friend here.
- Gelatin or liquid latex: Perfect for creating skin-like textures for wounds and gashes.
- Toilet paper or cotton balls: These can be used to build up layers and add bulk to your gory creations.
- Petroleum jelly or glycerin: For adding a glossy, moist look to your effects, making them appear fresh and realistic.
- Makeup brushes and sponges: Useful for applying and blending the blood and gore materials seamlessly.
Having these materials ready ensures you can experiment and achieve the desired level of realism for your cosplay.
Creating the Perfect Blood Recipe
The key to realistic cosplay blood lies in the right formulation. Experiment with different combinations of ingredients, but always prioritize safety and non-toxic options.
Basic Blood Recipe
This recipe is simple, effective, and uses easily accessible ingredients, making it perfect for beginners.
- In a bowl, mix one cup of corn syrup with a few drops of red food coloring.
- Add one or two drops of blue or green food coloring to deepen the red.
- Gradually add water until you reach the desired consistency – typically about a quarter cup.
- If you want a more realistic, slightly older blood look, add a pinch of cocoa powder or coffee grounds.
- Stir well until all ingredients are thoroughly combined and the color is uniform.
Testing and Adjusting Your Blood
Once you’ve mixed your batch of blood, it’s important to test it and make adjustments as needed.
- Color: Check the color in different lighting conditions to ensure it looks realistic both indoors and outdoors. Adjust the food coloring as necessary.
- Consistency: Test how the blood drips and flows. If it’s too thick, add more water; if it’s too thin, add more corn syrup.
- Durability: Apply a small amount of blood to a test piece of fabric or skin (if you’re absolutely sure you don’t have allergies) to see how it holds up over time and under different conditions, like heat or moisture.
By carefully testing and adjusting your blood recipe, you can ensure that it looks and performs perfectly for your cosplay.
Crafting Realistic Wound Effects
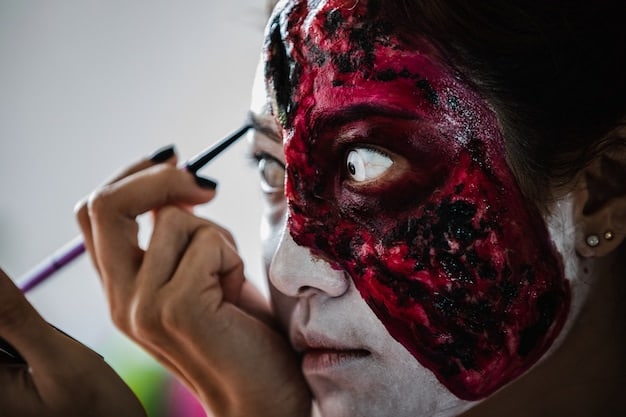
Creating realistic wounds is an essential part of any convincing gore-filled cosplay. The right techniques can transform simple materials into gruesome, believable injuries.
Simple Cuts and Scratches
Creating smaller cuts and scratches is a great way to use up left-over blood. These are the most basic wound effects, but when done right, they can add a lot of realism to your cosplay.
- Apply a thin layer of liquid latex to the area where you want the cut or scratch.
- Let the latex dry partially, then gently peel or tear it to create a rough edge.
- Use a makeup brush to apply a small amount of dark red or brownish makeup to the wound’s base, creating a shadow effect.
- Fill the wound with your homemade blood, letting it drip naturally.
Deeper Wounds and Gashes
For more dramatic effects, creating deeper wounds and gashes requires a bit more layering and texture.
- Start by applying a thicker layer of liquid latex or gelatin to the desired area.
- While the latex is still wet, use a toothpick or sculpting tool to create a deep gash or wound shape.
- Add small pieces of toilet paper or cotton balls to build up the edges of the wound, creating a raised effect.
- Once the latex is dry, apply dark red and brownish makeup to the wound’s interior to create depth and shadow.
- Fill the wound with your homemade blood, adding clots and texture with cocoa powder or coffee grounds.
Experimenting with different tools and techniques will allow you to create a variety of realistic wound effects that truly stand out.
Applying Blood for Maximum Impact
The application of blood is an art in itself. Knowing how to strategically place and distribute blood can significantly enhance the realism of your cosplay.
Dripping Effects
Dripping blood is a classic and effective way to create a sense of drama and urgency. However, the devil is always in the details.
- Use a small brush or dropper to apply blood to specific areas, such as the forehead, neck, or hands.
- Allow the blood to drip naturally, creating streaks and trails that mimic real blood flow.
- Vary the thickness and amount of blood to create a more dynamic and believable effect.
Splatter Effects
Creating splatter effects can add a sense of violence and chaos to your cosplay, making it appear as if you’ve just been in a fight.
- Load a makeup brush with blood and flick it towards your costume or skin, creating a splatter pattern.
- Use your fingers to gently tap the brush, creating smaller, more controlled splatters.
- Protect surrounding areas with newspaper or plastic sheeting to avoid unwanted messes.
Mastering these application techniques will help you create visually striking and realistic blood effects that captivate and horrify.
Safety Tips and Best Practices
While creating realistic blood and gore effects, your safety should always be your top priority, and you should aim to make it feel as comfortable as possible for yourself and those with you.
Non-Toxic Ingredients Only
Be sure to stick to non-toxic ingredients. The ingredients in your blood might end up in your mouth or eyes. Using potentially toxic chemicals is a big no-no. When in doubt, do some research.
- Always use food-grade ingredients for your blood recipes.
- Avoid using paints, dyes, or other chemicals that are not intended for skin contact.
- Check the labels of all your materials to ensure they are non-toxic and safe to use.
Skin Sensitivity
Skin sensitivities exist, and they’re not something you can prevent. That’s why testing is always recommended.
- Before applying blood or gore effects to a large area of your skin, test a small amount on a less visible area, like your wrist or ankle.
- Wait at least 30 minutes to see if you experience any redness, itching, or irritation.
- If you have sensitive skin or known allergies, opt for hypoallergenic materials and recipes.
By following these safety tips and best practices, you can enjoy creating realistic blood and gore effects without compromising your health or well-being.
| Key Element | Brief Description |
|---|---|
| 🩸 Blood Recipe | Mix corn syrup, red food coloring, and a touch of blue for realistic blood. |
| 🔪 Wound Effects | Use liquid latex and tissue to create cuts and gashes. |
| 🎨 Blood Application | Apply blood using dripping and splatter techniques for a dynamic look. |
| 🛡️ Safety | Prioritize non-toxic, food-grade materials to ensure safety. |
FAQ
▼
The best way to make fake blood is using a mix of corn syrup, red food coloring, and a touch of blue or green for depth. Adjust the consistency with water and add cocoa powder for a more realistic look.
▼
To avoid staining, use washable food coloring and test the blood on a scrap of fabric first. Applying a fabric protector spray can also help prevent stains, but be sure to spot check there as well.
▼
To create a realistic wound, you’ll need liquid latex or gelatin, toilet paper or cotton balls, dark red and brownish makeup, and your homemade blood. These materials will help build texture and depth.
▼
For a convincing splatter effect, load a makeup brush with blood and flick it towards your costume or skin. Protect surrounding areas and use your fingers to control the size and distribution of the splatters.
▼
Yes, as long as you use non-toxic, food-grade ingredients. Always test a small amount on a less visible area first to check for any allergic reactions or skin sensitivities before applying it.
Conclusion
Creating realistic cosplay blood and gore effects is an exciting way to elevate your costumes and performances. By following this step-by-step tutorial, experimenting with different techniques, and prioritizing safety, you can achieve stunningly believable effects that will leave a lasting impression. The beauty of cosplay is that it’s meant to be fun, so don’t be afraid to make mistakes and learn along the way. So, what are you waiting for? Get cracking and create the cosplay of your dreams!


