Cosplay Armor Detailing: Intricate Designs with Craft Foam & Worbla
Cosplay armor detailing using craft foam and Worbla involves creating intricate designs through cutting, shaping, layering, and heat-forming techniques, embellished with paints, textures, and finishes for a realistic appearance.
Elevate your cosplay game by mastering cosplay armor detailing: Adding intricate designs with craft foam and Worbla. Whether you’re a beginner or a seasoned cosplayer, this guide will walk you through the essential techniques to create stunning, realistic armor pieces.
Getting Started with Craft Foam and Worbla
Craft foam and Worbla are two of the most popular materials for cosplay armor. They are lightweight, relatively inexpensive, and easy to work with, making them ideal for creating intricate designs and durable armor pieces.
Before diving into the details, let’s understand why these materials are preferred and what basic tools you’ll need.
Why Choose Craft Foam and Worbla?
Craft foam is excellent for base layers and intricate details due to its flexibility and affordability. Worbla, a thermoplastic, can be heat-formed into complex shapes and provides a sturdy, impact-resistant surface.
- Cost-Effective: Craft foam is budget-friendly, allowing you to experiment without significant financial risk.
- Versatile: Both materials can be easily cut, shaped, and layered to achieve various design elements.
- Durable: Worbla, when properly applied, creates a robust shell that can withstand wear and tear.
These properties make craft foam and Worbla staples in the cosplay community, especially for detailed armor designs.
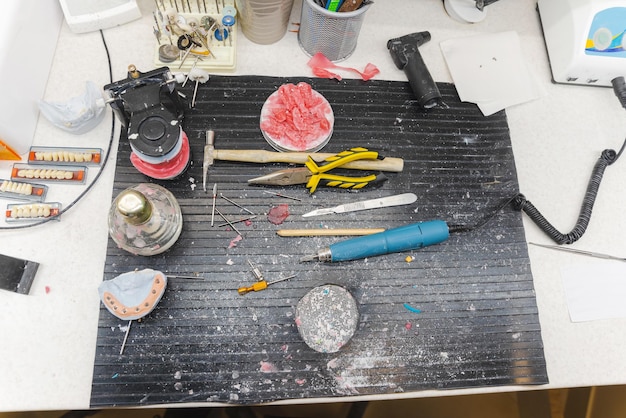
Essential Tools for Cosplay Armor Detailing
Having the right tools is crucial for effective cosplay armor detailing: Adding intricate designs with craft foam and Worbla. These tools will help you cut, shape, and finish your armor pieces with precision.
Here’s a list of essential tools that every cosplayer should have in their toolkit:
- Craft Knife or Utility Knife: For precise cutting of craft foam and Worbla.
- Heat Gun: Essential for shaping Worbla.
- Cutting Mat: To protect your work surface.
- Ruler and Measuring Tape: For accurate measurements and pattern creation.
With these tools, you’ll be well-equipped to start creating detailed designs on your cosplay armor.
Creating Basic Shapes and Patterns
Before adding intricate details, mastering the basics of shape creation is essential. This involves designing templates, cutting the foam and Worbla, and shaping them into fundamental armor components.
Creating basic shapes and patterns is the first step in bringing your armor to life.
Designing Templates
Start by sketching your desired armor pieces on paper. Transfer these sketches onto cardboard or thick paper to create durable templates.
Templates serve as guidelines for cutting accurate shapes from your chosen materials.
Cutting Craft Foam and Worbla
Use your templates to trace the shapes onto craft foam or Worbla. Employ a sharp craft knife for foam and scissors or a craft knife for Worbla.
Ensure clean cuts to avoid jagged edges that can compromise the final look of your armor.
Creating and cutting precise shapes is the foundation for successful cosplay armor detailing: Adding intricate designs with craft foam and Worbla.
Layering and Adding Depth
One of the most effective techniques for creating visually appealing armor is layering. This involves stacking different pieces of foam and Worbla to add depth and dimension to your design.
Layering transforms flat surfaces into dynamic, three-dimensional pieces.
Techniques for Layering
Begin by creating a base layer with thicker craft foam. Add subsequent layers with thinner foam or Worbla to create raised details and textures.
Use contact cement or hot glue to securely bond the layers together.
Creating Raised Details
To achieve raised details, cut smaller shapes from foam or Worbla and attach them to the base layer. These can include geometric patterns, raised edges, or decorative elements.
Heat-forming Worbla can create seamless transitions between layers, enhancing the overall aesthetic.
- Use Different Thicknesses: Varying foam thicknesses adds more visual interest.
- Heat Weld Worbla: Heat can bond overlapping Worbla pieces for a seamless look.
- Sand Edges: Smoothing the edges of each layer ensures a professional finish.
Through careful layering, you can achieve intricate details that make your cosplay armor detailing: Adding intricate designs with craft foam and Worbla stand out.
Advanced Detailing Techniques with Worbla
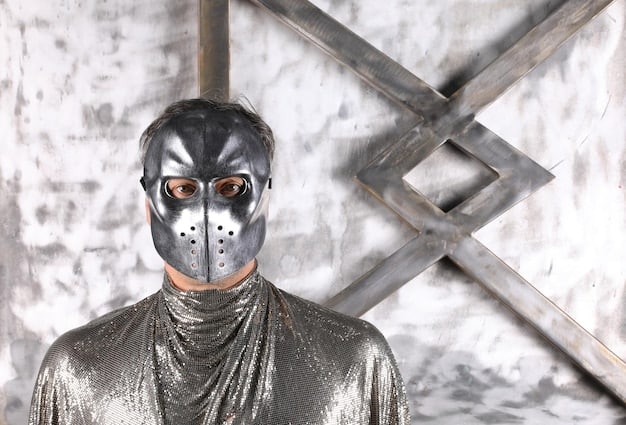
Worbla’s unique properties allow for advanced detailing techniques that can elevate your armor to the next level. Heat-forming allows for creating smooth curves, ridges and complex textures.
Mastering these techniques will significantly enhance the realism and visual appeal of your armor.
Heat-Forming and Shaping
Using a heat gun, gently heat Worbla until it becomes pliable. Shape it around molds or forms to create curved armor pieces.
Work quickly while the Worbla is warm to achieve the desired shape accurately.
Creating Intricate Patterns
Use tools like sculpting knives and texture rollers to imprint intricate patterns onto the warm Worbla. These patterns can mimic metal textures, engravings, or organic designs.
Experiment with different tools to discover the textures that best suit your cosplay.
- Sculpting: Use clay tools to carve details before the Worbla cools.
- Texture Rollers: Apply seamless patterns quickly.
- Stamping: Press pre-made stamps for consistent designs.
These advanced techniques make your cosplay armor detailing: Adding intricate designs with craft foam and Worbla more authentic and visually striking.

Adding Texture and Surface Finishes
Texture and surface finishes are crucial for making your armor look realistic. These finishes mimic wear and tear, metal effects, and other visual elements that bring your armor to life.
Applying texture and finishes adds depth and realism to your cosplay.
Creating Realistic Textures
Use a variety of materials to add texture to your armor. This can include texturing pastes, stippling brushes, or even household items like sandpaper.
Experiment to find the techniques that best replicate the textures you desire.
Painting Techniques for Metal Effects
Achieving a convincing metal look involves several painting techniques. Start with a metallic base coat, followed by washes and dry brushing to create shadows and highlights.
Apply weathering effects, such as rust and scratches, to enhance the realism further.
- Base Coat: Apply a smooth metallic paint as the foundation.
- Washes: Use diluted paints to fill in crevices, creating depth.
- Dry Brushing: Lightly brush metallic paint over raised areas to highlight edges.
Realistic texture and finishes are vital for effective cosplay armor detailing: Adding intricate designs with craft foam and Worbla.
Sealing and Protecting Your Armor
Sealing and protecting your armor ensures its longevity and maintains the quality of your detailing work. A good sealant protects against scratches, moisture, and UV damage.
Protecting your armor is the final step in creating durable and beautiful cosplay pieces.
Choosing the Right Sealant
Select a sealant that is compatible with both craft foam and Worbla. Acrylic-based sealants are generally a good choice, as they provide a flexible and durable finish.
Apply several light coats, allowing each coat to dry completely before applying the next.
Maintaining Your Armor
Regularly inspect your armor for signs of wear and tear. Touch up any damaged areas with fresh paint and reapply sealant as needed.
Store your armor in a cool, dry place to prevent warping or damage.
- Regular Inspections: Check for damage after each wear.
- Touch-Ups: Repair any scratches or chips promptly.
- Proper Storage: Store in a cool, dry place away from direct sunlight.
By sealing and maintaining your armor, you can ensure that your detailed work remains intact for years to come.
| Key Point | Brief Description |
|---|---|
| 🛠️ Essential Tools | Craft knife, heat gun, and cutting mat are vital for detailed work. |
| 📐 Template Design | Creating accurate templates sets the foundation for precise shapes. |
| 🔥 Heat-Forming | Using heat to shape Worbla into complex, curved pieces. |
| 🎨 Painting Techniques | Applying layers of paint, washes, and dry brushing to create realistic metal effects. |
Frequently Asked Questions
▼
Use a sharp craft knife or utility knife with a fresh blade on a cutting mat. Make sure to apply consistent pressure and follow your template closely for clean, accurate cuts.
▼
Lightly lubricate your tools with water or a silicone-based spray. This will prevent the hot Worbla from sticking and make it easier to shape. Also, working on a non-stick surface can help.
▼
Acrylic paints are ideal for both materials. They are flexible, durable, and adhere well. Prime your surfaces first to ensure better paint adhesion and a smoother finish before painting.
▼
Use washes and dry brushing to replicate wear and tear. Apply dark washes to crevices and dry brush metallic paints on raised areas. Sandpaper can create realistic scratches and scrapes.
▼
Store your armor in a cool, dry place away from direct sunlight to prevent warping. Use padded hangers or mannequins to maintain its shape. Cover it with a breathable cloth to protect from dust.
Conclusion
Mastering cosplay armor detailing: Adding intricate designs with craft foam and Worbla allows you to create professional-quality armor pieces that truly stand out. With the right tools, techniques, and a bit of practice, you can bring your most ambitious cosplay visions to life, impressing fellow cosplayers and fans alike.


