Cosplay Repair Guide: Fixes for Costumes and Props
A Cosplay Repair Guide offers practical solutions for fixing common costume and prop problems, ensuring cosplayers can maintain their creations and continue to enjoy their hobby without the stress of constant wear and tear.
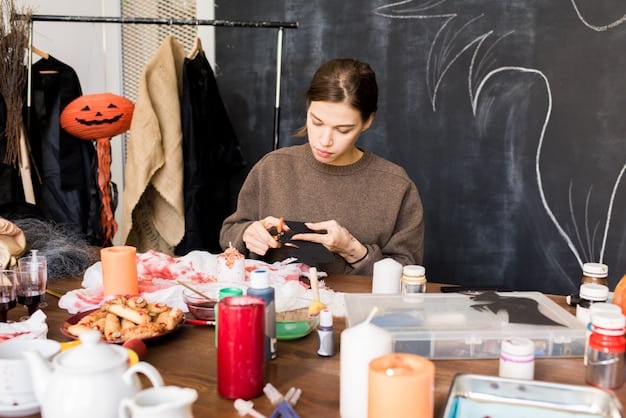
Is your prized cosplay suffering from battle damage? Don’t fret! This Cosplay Repair Guide: Fixing Common Costume and Prop Problems will equip you with essential knowledge and techniques to mend, restore, and prolong the life of your beloved creations, preventing small damages to become bigger issues.
Essential Tools and Materials for Cosplay Repair
Before diving into repairs, it crucial to have the right tools and materials readily available. A well-stocked repair kit can save time and frustration, allowing you to tackle various issues efficiently and get your cosplay back in action quicker. Consider this your essential arsenal for any cosplay emergency.
Basic Sewing Kit
A sewing kit is indispensable for fabric-based repairs. Having the right colors and types of thread is essential. Different types of needles will assist in these repairs.
- Needles: Assorted sizes for different fabric types.
- Thread: Matching colors to your costumes.
- Scissors: Small and sharp for precise cutting.
- Seam Ripper: For undoing stitches without damaging fabric.
Adhesives
Adhesives are essential for bonding various materials used in cosplay construction. These can range from fabrics to plastics and more.
- Hot Glue Gun: Versatile for quick fixes on various materials.
- Contact Cement: Strong bond for foam and leather.
- Super Glue: For small, quick repairs but use cautiously.
- Fabric Glue: Specifically for fabrics, ensures flexibility and washability.
Having a variety of adhesives on hand allows you to address different types of repairs effectively. Each adhesive has its own strengths and weaknesses, so choosing the right one for the job ensures a durable and long-lasting repair.
Fixing Fabric-Based Cosplay Issues
Fabric-based costumes are susceptible to rips, tears, and seam breaks. Don’t abandon your costume after just one con! Fortunately, many of these issues can be resolved with basic sewing skills and some patience.
Mending Rips and Tears
Rips and tears can happen from stress or snagging on something and usually require more than just glue to fix effectively.
To mend a rip or tear, start by trimming any frayed edges. Then, use a needle and thread to stitch the edges together, creating a neat and secure seam. For larger tears, consider using an iron-on patch on the inside of the fabric for added support. Select a patch that matches the color of your fabric as closely as possible to make the repair less noticeable.
If the rip is in a high-stress area, reinforce the repair with additional stitches or a piece of sturdy fabric behind the damaged area. This prevents the tear from reoccurring and extends the life of your costume.
Employing these techniques will not only fix the immediate problem but also prevent future issues, ensuring your costume remains durable and ready for many more events.
Reinforcing Weak Seams
Weak seams are a common issue, especially in areas that experience a lot of movement or stress. Strengthening these seams can prevent future problems and keep your costume intact.
To reinforce a weak seam, sew a new line of stitching close to the original seam. Use a sturdy thread and a slightly longer stitch length for added strength. For particularly weak seams, consider using a serger if you have access to one. A serger overlocks the edges of the fabric, creating a durable and professional-looking finish that prevents fraying and adds extra strength.
Another method is to add a strip of seam tape or twill tape along the seam line on the inside of the garment. This provides extra support and prevents the fabric from stretching or pulling apart under stress.
By taking these proactive steps, you can significantly extend the lifespan of your fabric-based cosplays and ensure they hold up well under the rigors of frequent wear.
Repairing Armor and Prop Damage
Armor and props often face the brunt of wear and tear, especially during conventions. Whether its a cracked helmet or a broken sword tip, knowing how to repair these items is essential for any cosplayer.
Fixing Cracks in Foam Armor
Cracks in foam armor can detract from the overall look of your costume, but they are often simple to repair.
Start by cleaning the area around the crack with a mild detergent to remove any dirt or oils. Allow the area to dry completely, then apply a thin layer of contact cement to both sides of the crack. Wait for the adhesive to become tacky before pressing the edges together.
For larger cracks, consider reinforcing the repair with a piece of scrap foam behind the damaged area. This provides extra support and prevents the crack from reopening. Use hot glue to adhere the reinforcement piece to the inside of the armor.
Once the adhesive has dried, you can smooth out any uneven surfaces with a heat gun. Gently heat the foam and use your fingers or a sculpting tool to blend the repaired area with the surrounding surface. Be careful not to overheat the foam, as this can cause it to melt or distort.
With these techniques, you can effectively repair cracks in your foam armor, restoring its structural integrity and aesthetic appeal.
Reattaching Broken Prop Pieces
Props, particularly those with intricate designs, are prone to breaking. Whether it’s a sword tip or a decorative element, reattaching broken pieces requires care and the right adhesives.
Begin by cleaning the broken surfaces thoroughly. Remove any old glue or debris with a solvent such as isopropyl alcohol. Ensure the surfaces are completely dry before proceeding.
Apply a strong adhesive, such as epoxy or super glue, to both broken surfaces. For larger pieces, consider using a two-part epoxy for a stronger and more durable bond. Align the pieces carefully and hold them together until the adhesive sets. Use clamps or tape to keep the pieces in place while the adhesive cures.
To reinforce the repair, consider adding pins or dowels to the joint. Drill small holes into both pieces and insert the pins or dowels with adhesive. This adds extra mechanical strength to the bond and prevents the pieces from separating again.
By following these steps, you can effectively reattach broken prop pieces, restoring your props to their former glory and ensuring they can withstand the rigors of cosplay events.
Effectively repairing damage to armor and props ensures that you can continue to showcase your work without worrying about the integrity of your armor. You can save money and time by repairing instead of rebuilding.
Painting and Finishing Touches
After repairing structural damage, restoring the paint and finish is crucial to seamlessly blend the repaired areas with the rest of your cosplay. A consistent and professional finish can make all the difference in the final appearance of your costume.
Touch-Up Painting Techniques
Touching up paint involves matching colors and applying paint to small areas seamlessly. A proper paint job can elevate the rest of the cosplay.
Start by obtaining the exact paints you used originally or by mixing new paints to match the existing colors. Ensure you have the right type of paint for your material, whether it’s acrylic for foam or fabric paint for textiles. Clean the area to be touched up and apply the paint in thin, even layers to avoid drips and inconsistencies.
For metallic finishes, use metallic paints or powders and apply them with a soft brush to achieve a realistic sheen. Practice blending the new paint with the old using techniques like dry brushing or stippling.
- Dry Brushing: Using a dry brush with a small amount of paint to create a textured effect.
- Stippling: Applying paint with a sponge or brush in a dabbing motion to blend colors.
Sealing and Weathering
Sealing and weathering are final steps that protect your paint job and add realism to your cosplay.
Sealing protects the paint from scratches, moisture, and UV damage. Apply a clear coat sealer in a well-ventilated area, using multiple thin coats for best results. Weathering techniques can create a worn, battle-hardened look. Use techniques like dry brushing with darker colors, applying washes, or using weathering powders to add depth and realism.
- Washes: Diluted paint applied to recesses to create shadows and depth.
- Weathering Powders: Powders applied with a brush to simulate dirt, rust, or other effects.
By mastering these techniques, you can ensure your repairs are invisible and your cosplay looks professionally finished.
Painting and finishing are really just the details that make the entire cosplay come together by hiding any of the repairs you performed on it. Taking your time with your paint job can significantly improve your overall presentation!
Preventative Measures to Minimize Damage
Prevention is always better than cure, especially when it comes to cosplays. Taking proactive measures to protect your costumes and props can significantly reduce the need for repairs and extend their lifespan. These measures can range from proper storage techniques to ensuring that your cosplay is as durable as possible.
Proper Storage Techniques
How you store your cosplay when it’s not in use can significantly impact its condition. Proper storage prevents damage from dust, moisture, and physical wear and tear.
For fabric-based costumes, use garment bags to protect them from dust and sunlight. Store them in a cool, dry place away from direct sunlight to prevent fading. For armor and props, store them in sturdy containers or on shelves to prevent them from being crushed or damaged. Wrap delicate pieces in bubble wrap or foam padding to prevent scratches and breaks.
Consider using acid-free tissue paper to stuff costume pieces to maintain their shape and prevent wrinkles. Avoid storing cosplays in damp or humid environments, as this can lead to mold and mildew growth. By following these storage tips, you can keep your cosplays in pristine condition for years to come.
Reinforcing Stress Points
Identifying and reinforcing stress points is crucial for preventing damage during wear. These are areas of your costume that experience a lot of movement or tension, such as seams, joints, and attachment points.
Reinforce seams with extra stitching or seam tape to prevent them from ripping. Add extra padding or support to joints in armor and props to prevent them from breaking under stress. Use sturdy hardware, such as buckles and clasps, to secure attachment points and prevent them from coming loose. Consider using flexible materials in high-stress areas to allow for movement without causing damage.
By proactively reinforcing stress points, you can significantly reduce the risk of your cosplay breaking or tearing during wear, ensuring it looks great throughout your events.
With preventative measures in place, you can extend the life of your cosplay while enjoying the hobby for many years. With a little preventative maintenance, you can prevent having to do more costly repairs on your costumes.
Emergency Repair Kit for Conventions
Being prepared for unexpected damages at a convention is essential for any serious cosplayer. As the saying goes: “Hope for the best, plan for the worst”. Having an emergency repair kit with you can save the day and prevent minor issues from ruining your experience.
What to Include in Your Kit
An emergency repair kit should contain a variety of tools and materials to address common cosplay issues.
- Mini Sewing Kit: Needles, thread, safety pins, and small scissors for quick fabric repairs.
- Adhesives: Super glue, hot glue sticks, and fabric glue for bonding various materials.
- Spare Parts: Extra buttons, snaps, and buckles to replace broken or missing components.
Organization and Portability
Keeping your emergency repair kit organized and portable ensures you can quickly access the necessary tools and materials when needed.
Use a small tackle box or a multi-compartment container to organize your kit. Label each compartment to easily identify the contents. Keep small items in resealable bags to prevent them from getting lost. Ensure your kit is lightweight and easy to carry, so you can take it with you wherever you go during the convention.
Consider adding a small flashlight or headlamp to your kit for working in low-light conditions. By keeping your emergency repair kit organized and portable, you’ll be prepared to tackle any unexpected cosplay issues that arise.
Having an emergency repair kit with you always ensures that you are able to maintain your cosplay throughout the event. Being prepared for situations will allow you to have a more joyous experience overall.
| Key Point | Brief Description |
|---|---|
| 🧰 Essential Tools | Sewing kits, adhesives, and cutting tools. |
| 🧵 Fabric Repairs | Mending rips, tears, and reinforcing weak seams. |
| 🛡️ Armor & Prop Fixes | Repairing cracks and reattaching broken pieces. |
| 🛡️ Preventative maintenance | Proper storage and reinforcement to minimize future repairs. |
FAQ
Contact cement is generally considered the best adhesive for foam armor, providing a strong and flexible bond that can withstand stress. Hot glue is also useful for quick fixes, although that repair may not last.
Reinforce weak seams by adding extra stitching or seam tape. Ensuring that you reinforce any areas with stress or tension, such as joints, helps. Proper storage techniques also help.
A mini sewing kit, various adhesives (such as super glue and fabric glue), spare parts (buttons, snaps), and small tools (scissors, pliers) are essential. You want to be ready for anything!
Try to obtain the exact paints you used originally. Mix new paints to match the existing colors, testing on a scrap piece first to ensure accurate matching. Apply in light, thin layers to avoid drips.
Use garment bags for fabric costumes to protect from dust and sunlight. Store in a cool, dry place. For armor and props, use sturdy containers with padding to prevent crushing or scratching the pieces within.
Conclusion
Mastering the art of cosplay repair ensures that your creations remain vibrant and durable, extending their lifespan and allowing you to fully enjoy your cosplay experiences. By equipping yourself with the right tools, techniques, and preventative measures, you can confidently tackle any damage and keep your cosplays in top condition for years to come.


