Cosplay LED Lighting Guide: Illuminate Your Costume for Impact

Cosplay LED lighting enhances costumes through strategic placement of LED lights, offering creative options such as glowing effects, programmable colors, safety features, and improved visibility for a visually stunning and safe cosplay experience.
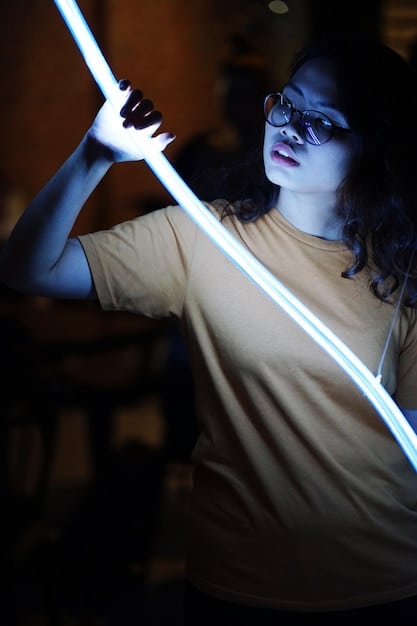
Ready to take your cosplay to the next level? This Cosplay LED Lighting Guide: Illuminating Your Costume for Maximum Impact will walk you through everything you need to know about adding stunning LED effects to your creations.
Getting Started with Cosplay LED Lighting
Adding LEDs to your cosplay can transform it from ordinary to extraordinary. But where do you start? This section covers the basics of incorporating LED lights into your costume, ensuring a visually appealing and safe result.
Understanding the types of LEDs available and how to integrate them seamlessly into your design is crucial. Let’s explore the essential aspects of planning your LED lighting project.
Types of LEDs for Cosplay
Choosing the right type of LED is the first step. Different LEDs offer varying brightness, color options, and power requirements. Here are some popular options:
- Strip LEDs: Flexible and easy to cut, perfect for outlining edges and adding linear light.
- Individual LEDs: Great for small details and creating concentrated points of light.
- Fiber Optic LEDs: Ideal for delicate, glowing accents with a soft, diffused light.
- Addressable LEDs (NeoPixels): Allow for complex lighting patterns and individual LED control for dynamic effects.
Consider the specific needs of your cosplay design when selecting your LEDs. Think about brightness, color, and how the light will be diffused or focused.
Planning Your Lighting Design
Before you start wiring, sketch out your lighting design. Consider these factors:
- Placement: Where will the LEDs be most effective? Think about highlighting key features of your costume.
- Power Source: How will you power the LEDs? Batteries, USB power banks, or other options need to be considered.
- Wiring: Plan the routes for your wires, ensuring they are hidden and secure.
- Control: Will you use a switch, a remote, or a programmable controller to manage the lights?
Planning ahead will save you time and prevent headaches during the construction phase. A well-thought-out design will ensure a professional and polished final product.
In summary, beginning with cosplay LED lighting involves selecting the correct type of LEDs and effectively planning the lighting design, considering factors like placement, power, wiring, and control for a professional finish.
Choosing the Right LED Components
Selecting the right components is critical for a successful cosplay LED project. This section delves into the specifics of LEDs, power sources, controllers, and wiring, ensuring your lights shine brightly and safely.
Understanding the technical aspects of each component will help you make informed decisions and avoid common pitfalls. Let’s explore the essential elements.

LED Specifications
Understanding LED specifications is vital. Consider these factors:
- Voltage: Ensure your power source matches the voltage requirements of your LEDs.
- Current: Check the current draw of your LEDs to select an appropriate power source and wiring.
- Brightness: Choose LEDs with appropriate brightness for your design. Too bright can be blinding, while too dim might not be visible.
- Color Temperature: Select the color temperature (warm, neutral, cool) that best suits your costume’s aesthetic.
Paying attention to these details will help you avoid damaging your LEDs and ensure they perform as expected.
Power Source Options
The power source is the heart of your LED system. Common options include:
- Batteries: Portable and convenient, but require regular replacement or recharging.
- USB Power Banks: Rechargeable and readily available, but may require voltage conversion.
- AC Adapters: Suitable for stationary costumes, providing a stable power supply.
Select a power source that is both practical and safe for your specific cosplay needs. Consider the weight, size, and runtime of the power source.
In brief, selecting the right LED components, including LEDs, power sources, along with controllers and wiring, is fundamental to a successful as well as safe cosplay LED lighting project.
Wiring and Circuit Basics
Mastering the basics of wiring and circuits is essential for creating a reliable and safe LED system. This section covers the fundamentals of wiring LEDs, using resistors, and understanding basic circuit diagrams.
A solid understanding of these concepts will help you avoid short circuits, overheating, and other potential hazards. Let’s delve into the key principles.
Understanding Series and Parallel Circuits
LEDs can be wired in series or parallel. Each configuration has its advantages and disadvantages:
- Series: LEDs are connected one after the other. If one LED fails, the entire string goes out. Requires a higher voltage.
- Parallel: LEDs are connected side by side. If one LED fails, the others continue to work. Requires a higher current.
Choose the wiring configuration that best suits your design and power source. Consider the reliability and efficiency of each option.
Using Resistors with LEDs
Resistors are essential for protecting LEDs from overcurrent. Ohm’s Law (V = IR) can help you calculate the correct resistor value:
- Calculate the Voltage Drop: Subtract the LED’s forward voltage from the power source voltage.
- Determine the Current: Find the LED’s forward current rating.
- Apply Ohm’s Law: R = Voltage Drop / Current
Using the correct resistor value will ensure your LEDs operate within their safe limits and prolong their lifespan.
Basic Circuit Diagrams
A circuit diagram is a visual representation of your LED system. It shows how the components are connected:
- Symbols: Learn the symbols for LEDs, resistors, power sources, and other components.
- Layout: Draw a clear and accurate diagram before you start wiring.
- Testing: Use the diagram to troubleshoot any issues with your circuit.
Circuit diagrams provide a roadmap for your project, making it easier to build and maintain your LED system.
Using resistors with LEDs is crucial to safeguard them, while understanding basic circuit diagrams is beneficial for constructing, maintaining, and troubleshooting systems in cosplay LED lighting.
Integrating LEDs into Your Cosplay
The real magic happens when you integrate the LEDs into your cosplay. This section covers practical techniques for attaching LEDs to various materials, concealing wires, and ensuring durability.
Seamless integration is key to achieving a professional and polished look. Let’s explore the best practices for incorporating LEDs into your costume.
Attaching LEDs to Different Materials
Different materials require different attachment methods:
Fabric: Sew LEDs directly onto the fabric or use conductive thread.
- Armor: Use epoxy or hot glue to attach LEDs to rigid surfaces.
- Props: Embed LEDs into resin or other casting materials.
Choose an attachment method that is both secure and aesthetically pleasing. Consider the flexibility and movement of the material.
Concealing Wires Effectively
Hiding wires is essential for a clean and professional look. Here are some tips:
- Routing: Plan the routes for your wires carefully, using hidden channels or seams.
- Securing: Use tape, clips, or cable ties to keep wires in place.
- Color-Coding: Use colored wires to easily identify connections.
A well-concealed wiring system will enhance the overall appearance of your cosplay and prevent accidental damage.
Seams and Fabric Manipulation
When working with fabric, consider the following:
- Placement: Strategically place seams to hide wires and battery packs.
- Reinforcement: Reinforce areas where LEDs are attached to prevent tearing.
- Flexibility: Ensure the fabric remains flexible and comfortable to wear.
Proper fabric manipulation will ensure your LEDs are securely attached and your costume remains comfortable and functional. By attaching LEDs to different materials, concealing wires effectively, and manipulating seams meticulously, you enhance the overall impact of cosplay LED lighting.
Powering Your LED Cosplay Safely
Safety is paramount when dealing with electricity. This section outlines essential safety precautions for powering your LED cosplay, including battery safety, voltage regulation, and protection against short circuits.
Taking the necessary precautions will ensure your safety and the safety of those around you. Let’s explore the key safety measures.
Battery Safety Tips
Batteries can be hazardous if mishandled. Follow these guidelines:
- Correct Type: Use the correct type of battery for your LEDs and power source.
- Proper Storage: Store batteries in a cool, dry place, away from metal objects.
- Avoid Overcharging: Do not overcharge rechargeable batteries.
- Disposal: Dispose of batteries properly at a designated recycling center.
Following these tips will minimize the risk of battery-related accidents.
Voltage Regulation
Voltage regulation ensures a stable power supply to your LEDs. Consider using:
- Voltage Regulators: Maintain a constant voltage output, protecting LEDs from voltage spikes.
- Current Limiters: Limit the current to prevent LEDs from drawing too much power.
Stable voltage and current will prolong the lifespan of your LEDs and prevent damage.
Protection Against Short Circuits
Short circuits can cause overheating and fires. Protect your system with:
- Fuses: Use fuses to break the circuit in case of a short circuit.
- Circuit Breakers: Use circuit breakers for a resettable protection option.
- Proper Wiring: Ensure all wires are properly insulated and connected.
Implementing these safety measures will protect your cosplay and prevent potential hazards in cosplay LED lighting.
Troubleshooting Common LED Issues
Even with careful planning, issues can arise. This section provides solutions to common LED problems, including troubleshooting steps and preventative measures.
Knowing how to diagnose and fix problems will save you time and frustration. Let’s explore the common issues and their solutions.
LEDs Not Lighting Up
If your LEDs aren’t lighting up, check the following:
- Power Source: Ensure the power source is properly connected and charged.
- Wiring: Check for loose connections or broken wires.
- Polarity: Verify the polarity of the LEDs is correct.
Addressing these issues will often resolve the problem and get your LEDs shining again.
Flickering or Dim LEDs
Flickering or dim LEDs can be caused by:
- Low Voltage: Check the voltage of the power source.
- Resistor Value: Ensure the resistor value is correct.
- Loose Connections: Tighten any loose connections.
These steps will help stabilize the power supply and prevent flickering or dimming.
Overheating LEDs
Overheating can damage LEDs. Address this issue by:
- Lowering Current: Increase the resistor value to lower the current.
- Improving Ventilation: Ensure the LEDs have adequate ventilation.
- Using Heat Sinks: Attach heat sinks to dissipate heat.
Preventing overheating will prolong the lifespan of your LEDs and prevent premature failure.
Preventative steps are required in troubleshooting in cosplay LED lighting by addressing any issues that arise to resolve problems.
| Key Point | Brief Description |
|---|---|
| 💡 LED Selection | Choose the right type of LEDs (strip, individual, fiber optic) for your cosplay. |
| 🔋 Power Source | Select a suitable power source (batteries, USB power banks) and ensure it matches LED voltage. |
| 🛡️ Safety Measures | Implement safety precautions like voltage regulation, fuses, and proper wiring. |
| 🛠️ Troubleshooting | Address common issues like LEDs not lighting up, flickering, or overheating promptly. |
FAQ
Strip LEDs are flexible and easy to cut, ideal for outlining edges. Individual LEDs are great for small details. Fiber optic LEDs offer delicate, diffused light. Addressable LEDs (NeoPixels) allow complex patterns.
Consider batteries for portability, USB power banks for rechargeability, or AC adapters for stationary costumes. Ensure the power source matches the voltage requirements of your LEDs for safety.
Follow battery safety guidelines, use voltage regulators to protect LEDs from spikes, and implement fuses, as well as proper wiring to prevent short circuits and overheating for safety.
Check the power source, wiring, and polarity of the LEDs. Make sure all connections are secure, and the power source is properly charged to light up the LEDs.
Flickering or dim LEDs can be caused by low voltage, incorrect resistor value, or loose connections. Stabilize the power supply by addressing these issues to maintain steady brightness.
Conclusion
By following this Cosplay LED Lighting Guide: Illuminating Your Costume for Maximum Impact you should be able to take your costumes to the next level. Remember to plan carefully, choose your components wisely, prioritize safety, and don’t be afraid to experiment. With a little creativity and technical know-how, you can create truly stunning and memorable cosplays that shine!


