Master Armor Cosplay: Thermoplastics & EVA Foam Mastery
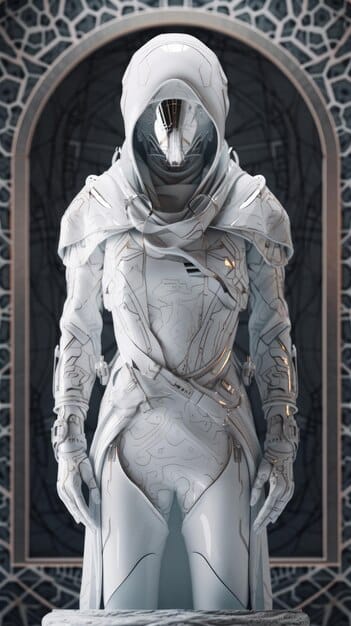
Mastering armor cosplay involves using thermoplastics and EVA foam techniques to create durable, detailed, and visually stunning costumes, allowing cosplayers to bring their favorite characters to life with precision.
Embark on a journey to mastering armor cosplay, where thermoplastics and EVA foam become your allies in crafting stunning, durable costumes. This guide provides essential techniques and insights for cosplayers of all skill levels, ensuring your creations stand out with impeccable detail and realism.
Introduction to Armor Cosplay Materials
Armor cosplay stands as a pinnacle of creative expression, demanding not only artistic vision but also a mastery of materials and techniques. Two materials consistently rise to prominence in the armor-building realm: thermoplastics and EVA foam. Each offers unique properties, advantages, and challenges.
This section dives into the fundamental aspects of thermoplastics and EVA foam, providing a foundational understanding for cosplayers venturing into armor construction with these versatile materials.
Understanding Thermoplastics
Thermoplastics are a family of plastics that become pliable and moldable above a specific temperature and solidify upon cooling. This characteristic makes them ideal for creating rigid, durable armor pieces that hold their shape well.
Exploring EVA Foam
EVA (Ethylene-Vinyl Acetate) foam, on the other hand, is a closed-cell foam known for its flexibility, lightweight nature, and ease of use. It’s particularly favored for its ability to be shaped, cut, and adhered with simple tools, making it accessible to cosplayers of all skill levels.
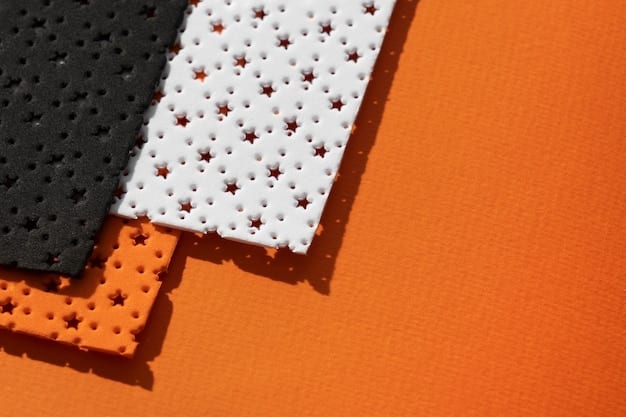
The choice between thermoplastics and EVA foam often hinges on the desired aesthetic, structural requirements, and individual preferences of the cosplayer. Let’s further explore each material to determine which one might be best for your creative project.
Essential Tools and Equipment
Creating impressive armor cosplay requires the right tools. A well-equipped workspace enhances precision, safety, and overall efficiency. Here are the essential tools and equipment needed for working with both thermoplastics and EVA foam:
This section provides a comprehensive overview of the must-have items that will transform your workspace into an armor-crafting haven. This overview will help ensure your project is not just successful but also enjoyable from start to finish.
Cutting and Shaping Tools
- Craft Knives: Essential for precise cuts on both thermoplastics and EVA foam.
- Scissors: Useful for trimming and cutting thinner sections of foam.
- Heat Gun: Used to heat and mold thermoplastics, as well as seal EVA foam.
- Rotary Tool: Ideal for sanding, grinding, and adding details to armor pieces.
Adhesion and Fastening
- Contact Cement: Provides a strong, durable bond for gluing EVA foam pieces together.
- Super Glue: Useful for small repairs and quick fixes.
- Rivets and Eyelets: Offer secure mechanical fasteners for joining armor components.
- Velcro Straps: Allow for adjustable and comfortable fitting of armor pieces.
Investing in quality tools will not only improve the final product but also streamline the building process. With the right equipment, transforming raw materials into stunning armor becomes a more manageable and rewarding experience.
Mastering Thermoplastic Techniques
Thermoplastics offer unparalleled opportunities for crafting durable and intricate armor pieces. However, mastering their use requires a solid understanding of specific techniques.
This section delves into the essential methods for shaping, molding, and finishing thermoplastics. These proven techniques will help cosplayers achieve professional-looking results.
Whether you are a beginner or an experienced crafter, the tips and tricks in this part will enhance your skills and elevate your armor-building endeavors.
Heating and Molding Processes
Learning to control heat application is crucial when working with thermoplastics. Even and consistent heating ensures the material becomes pliable without burning or scorching.
- Heat Gun Technique: Move the heat gun in a sweeping motion to evenly heat the thermoplastic.
- Mold Creation: Use molds made from clay, wood, or existing objects to shape the heated thermoplastic.
- Vacuum Forming: For more complex shapes, consider vacuum forming to achieve precise results.
Finishing Touches
Proper finishing enhances the appearance and longevity of your armor pieces.
- Sanding: Smooth edges and surfaces with sandpaper to prepare for painting.
- Priming: Apply a primer to create a uniform surface for paint adhesion.
- Painting: Use acrylic or enamel paints to add color and detail to the armor.
By mastering these techniques, cosplayers can unlock the full potential of thermoplastics, creating armor that is both visually stunning and structurally sound.
EVA Foam: Cutting, Shaping, and Texturing
EVA foam is celebrated for its versatility and ease of manipulation, making it popular among cosplayers. Getting the best results possible involves specific cutting, shaping, and texturing techniques.
This section highlights the core methods and creative approaches for transforming EVA foam into intricate armor components. Understanding these techniques will enable cosplayers to create dynamic, detailed, impressive armor.
These techniques will improve the appearance of your creations and enhance performance.
Precision Cutting
Accurate cuts are the foundation of any successful EVA foam project.
Using sharp craft knives and scissors ensures clean lines and precise shapes. Regularly replace blades to maintain sharpness and prevent ragged edges. Transfer patterns accurately onto the foam using stencils or templates.
Creating Contours and Curves
EVA foam’s flexibility allows for the creation of intricate curves and contours. Heat-shaping with a heat gun is essential for achieving smooth, organic forms.
Apply heat evenly and gently to avoid burning the foam. Use rounded objects or molds to guide the shaping process. For more complex curves, consider layering and gluing multiple foam pieces.
The ability to manipulate EVA foam into complex shapes expands creative possibilities, leading to authentic, eye-catching armor designs.
Adding Texture and Detail
Surface texture and detail elevate the realism of EVA foam armor. Scoring, carving, and embossing techniques can replicate the look of metal or other materials.
Use a rotary tool with various bits to carve patterns and details into the foam. Heat embossing with textured rollers or stamps adds intricate surface designs. Layering thin foam sheets creates depth and visual interest.
Experimentation with textures brings your cosplay armor to life, adding depth and visual appeal.
With these techniques, cosplayers can transform ordinary EVA foam into extraordinary armor pieces. Let’s now discuss assembly and finishing.
Assembly and Finishing Techniques
The ultimate stage in armor cosplay is assembly and finishing. These phases transform individual components into polished, wearable pieces.
This section addresses methods for joining armor segments, refining surfaces, and applying coatings. These steps will help you achieve a professional-grade, stunning final product.
Perfect assembly and finishing can elevate a simple costume to award-winning status.
Joining Armor Pieces
Proper assembly is essential for structural integrity and aesthetic appeal.
- Contact Cement: Provides a strong, flexible bond for EVA foam pieces.
- Rivets and Eyelets: Offer secure mechanical fasteners for joining thermoplastics or reinforcing foam connections.
- Velcro Straps: Enable adjustable and comfortable fitting, particularly useful for segmented armor.
Smoothing Surfaces
Smoothing prepares your armor for paint and adds a refined feel.
- Sanding: Use various grits of sandpaper to eliminate imperfections and create a smooth surface.
- Sealing: Apply a sealant like Plastidip to close foam pores and create a paint-ready surface.
- Filling: Use flexible fillers to smooth seams and gaps, ensuring a seamless appearance.
Achieving Realistic Finishes
Paint and weathering bring your armor to life.
- Priming: Apply primer to create a uniform surface for paint adhesion.
- Painting: Use acrylic or enamel paints for color and detail, applying multiple thin coats for even coverage.
- Weathering: Techniques like dry brushing, washes, and stippling add depth and realism, mimicking wear and tear.
Mastering these assembly and finishing techniques elevates the realism and durability of cosplay armor.
Advanced Techniques and Detailing
To truly stand out in the world of armor cosplay, embracing advanced techniques and intricate detailing is essential.
This section explores methods that take your armor to the next level, from incorporating intricate patterns to adding functional elements like lights and articulated joints. This will help you create compelling and immersive cosplay experiences.
Advanced details not only enhance visual appeal but also showcase your creativity and craftsmanship.
Incorporating Intricate Patterns
Unique patterns add visual complexity to your armor.
Use stencils or vinyl cutters to create precise designs on foam or thermoplastics. Engraving tools can carve patterns for depth and relief. Experiment with layering materials like worbla or fabric to add different textures and visual effects.
Adding Functional Elements
Functional elements enhance realism and interactivity.
Incorporate LED lights for glowing details or accents. Design articulated joints for movable limbs and armor segments. Integrate sound effects using small speakers and microcontrollers for added impact.
Creating Battle Damage and Weathering
Convincing battle damage tells a story and adds realism.
Use heat guns to warp edges and create dents in thermoplastics. Apply a rotary tool to create scratches and gouges in foam. Use weathering powders and washes to simulate dirt and stains, enhancing the worn effect.
By mastering these advanced detailing techniques, cosplayers can create armor that is not only visually impressive but also rich in character and storytelling.
| Key Point | Brief Description |
|---|---|
| 🛠️ Material Selection | Choose between thermoplastics for durability or EVA foam for flexibility. |
| 🔥 Heating & Shaping | Use heat guns to mold thermoplastics; shape EVA foam using heat and contouring. |
| 🎨Assembly & Finishing | Assemble pieces via contact cement or rivets, then paint and weather for realism. |
| ✨Advanced Detailing | Include intricate patterns, functional lights, and create realistic battle damage effects. |
Frequently Asked Questions
▼
Thermoplastics are rigid and durable, ideal for detailed, sturdy armor. EVA foam is flexible, lightweight, and easier to shape, making it great for intricate designs and comfort.
▼
No, regular glue won’t work well. Contact cement is recommended for EVA foam as it creates a strong and flexible bond. Super glue can be used for small fixes.
▼
Start by sanding the foam with fine-grit sandpaper. Then, seal it with a few coats of Plastidip or a similar sealant to fill the pores and create a smooth surface.
▼
Acrylic paints are popular for their flexibility and wide range of colors. Enamel paints provide a durable, glossy finish but can be less flexible, be sure to prime your armor well first.
▼
Use techniques like dry brushing, applying washes, and stippling to add depth and simulate wear. You can also use a heat gun to create dents and scratches for a battle-damaged look.
Conclusion
Mastering the art of armor cosplay with thermoplastics and EVA foam opens up a world of creative possibilities. By understanding the properties of each material, mastering essential techniques, and exploring advanced detailing, cosplayers can craft armor that is not only visually stunning but also structurally sound and full of character. Embrace the journey, experiment fearlessly, and let your imagination guide you as you bring your favorite characters to life.


