Mastering Armor Cosplay: Thermoplastics & EVA Foam Guide
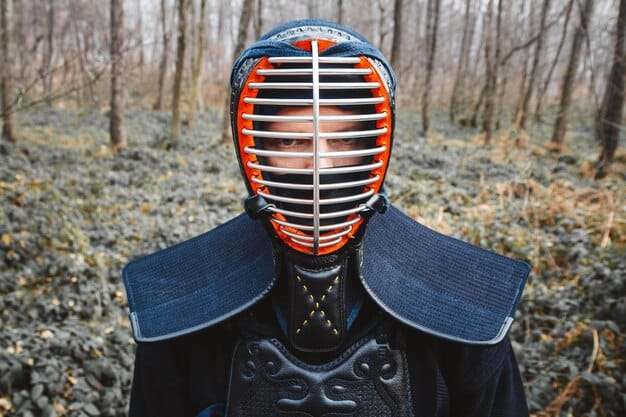
Mastering armor cosplay involves understanding the nuances of thermoplastics and EVA foam techniques, enabling creators to craft durable, visually stunning, and authentic-looking costumes.
Diving into the realm of cosplay can be both exhilarating and daunting, especially when the goal is to create intricate armor. The use of thermoplastics and EVA foam has revolutionized the cosplay world, allowing enthusiasts to bring their favorite characters to life with incredible detail and durability. This guide will walk you through the essential techniques for mastering armor cosplay using these versatile materials.
Understanding Thermoplastics for Armor Cosplay
Thermoplastics are a group of plastics that become pliable when heated and harden upon cooling, making them ideal for creating rigid armor pieces. This section delves into the properties, types, and techniques for working with thermoplastics.
Types of Thermoplastics Used in Cosplay
Several types of thermoplastics are popular among cosplayers due to their unique properties and ease of use.
- Worbla: A brand-name thermoplastic known for its reusability and self-adhesive properties.
- Fosshape: A heat-activated fabric that can be easily molded into complex shapes, often used for lightweight armor.
- Sintra (PVC Foam Board): A rigid plastic sheet that is easy to cut, shape, and paint, perfect for larger armor components.
Techniques for Shaping Thermoplastics
Shaping thermoplastics requires careful heating and molding to achieve the desired form.
- Heating: Use a heat gun to evenly heat the thermoplastic until it becomes pliable. Avoid overheating, which can cause the material to bubble or warp.
- Molding: Form the heated thermoplastic around a mold or directly onto your body using gloves to protect your hands.
- Smoothing: Use tools like silicone shapers or even your fingers (while wearing heat-resistant gloves) to smooth out any imperfections.

In summary, thermoplastics offer exceptional rigidity and detail for armor cosplay, but require careful heating and shaping techniques. Understanding the properties of different thermoplastics and mastering the molding process are crucial for achieving professional-looking results.
Exploring EVA Foam for Flexible Armor
EVA foam, or ethylene-vinyl acetate, is a versatile material known for its flexibility, durability, and affordability. It is widely used in cosplay for creating armor that is comfortable to wear and easy to customize. This section explores the benefits and techniques for using EVA foam.
Advantages of Using EVA Foam
EVA foam offers several advantages that make it a favorite among cosplayers.
- Flexibility: EVA foam can bend and flex without breaking, making it ideal for armor that needs to move with the body.
- Lightweight: It is significantly lighter than thermoplastics, reducing the overall weight of the costume and improving comfort.
- Affordability: EVA foam is readily available and relatively inexpensive, making it a cost-effective option for large-scale projects.
Cutting and Shaping EVA Foam
Proper cutting and shaping techniques are essential for achieving precise and professional-looking results with EVA foam.
- Cutting: Use a sharp craft knife or a utility knife with fresh blades to ensure clean, accurate cuts.
- Shaping: Heat shaping with a heat gun can create curves and contours. Apply heat gradually to avoid burning or deforming the foam.
- Beveling: Use a bevel knife or a sanding block to create angled edges, which are crucial for assembling armor pieces seamlessly.
EVA foam’s flexibility, lightweight nature, and affordability make it an excellent choice for creating comfortable and visually appealing armor. Mastering the techniques of cutting, shaping, and sealing EVA foam is key to achieving professional-quality results.
Essential Tools and Materials for Armor Cosplay
Creating high-quality armor cosplay requires a variety of tools and materials. This section outlines the essential items you’ll need to get started.
Basic Tools for Thermoplastics and EVA Foam
Having the right tools can significantly improve the efficiency and quality of your work.
Some essential tools include:
- Heat Gun: For shaping thermoplastics and EVA foam.
- Craft Knife/Utility Knife: For precise cutting.
- Cutting Mat: To protect your work surface.
- Metal Ruler: For accurate measurements and straight cuts.
Additional Materials for Detailing and Finishing
Beyond the basic tools, certain materials are essential for adding details and finishing touches to your armor.
- Contact Cement: For bonding EVA foam pieces together.
- Dremel/Rotary Tool: For sanding, shaping, and adding intricate details.
- Primer: To prepare the surface for painting.
Equipping yourself with the right tools and materials is crucial for successful armor cosplay. Understanding the purpose of each tool and how to use it effectively will enhance your craftsmanship and the overall quality of your creations.
Sealing and Priming Techniques for a Smooth Finish
Sealing and priming are critical steps in armor cosplay, ensuring a smooth, paintable surface that enhances the final appearance of your armor. This section covers the best techniques and materials for sealing and priming both thermoplastics and EVA foam.
Sealing EVA Foam
Proper sealing prevents paint absorption and provides a uniform surface.
Here are some common methods.
- Plasti Dip: A popular choice for its flexibility and durability. Apply multiple thin coats for best results.
- Heat Sealing: Gently heat the surface with a heat gun to close the pores of the foam. Be careful not to overheat and melt the foam.
Priming Thermoplastics
Priming thermoplastics ensures proper paint adhesion.
Ideal primers include:
- Automotive Primer: Provides a durable base for painting.
- Acrylic Gesso: Works well for creating a smooth surface on Worbla and other thermoplastics.
Sealing and priming are essential steps for achieving a professional finish on your armor cosplay. By following these techniques and using the right materials, you can ensure that your paint job is durable, vibrant, and visually appealing.
Painting and Weathering Your Armor
Painting and weathering are key steps in bringing your armor cosplay to life, adding depth, realism, and character to your creation. This section explores the best techniques and materials for achieving stunning effects.
Choosing the Right Paints
Selecting the right type of paint is crucial for durability and appearance.
Consider these paint types:
- Acrylic Paints: Versatile and easy to use, ideal for base coats and detailing.
- Spray Paints: Excellent for achieving a smooth, even finish on large surfaces.
Weathering Techniques for Realistic Effects
Weathering adds depth and realism to your armor. Some popular techniques include:
- Dry Brushing: Applying small amounts of paint with a dry brush to create highlights and textures.
- Washing: Diluting paint with water and applying it to recesses to simulate dirt and grime.
Painting and weathering are essential for adding the final touches to your armor cosplay. By mastering these techniques and experimenting with different materials, you can create armor that looks battle-worn and authentically detailed.
Assembling and Fitting Your Armor Pieces
Assembling and fitting your armor pieces is a crucial step in ensuring a comfortable and visually impressive cosplay. This section provides tips on assembling the pieces and making necessary adjustments for a perfect fit.
Methods for Connecting Armor Pieces
Choose the right method for secure and flexible connections.
Common methods include:
- Straps and Buckles: Adjustable and reliable for connecting larger pieces.
- Elastic: Provides flexibility and comfort for joints and moving parts.
Adjusting for Comfort and Mobility
Comfort is key for long cosplay events. Ensure your armor allows for natural movement.
Here are a few tips:
- Padding: Add foam padding to the inside of the armor for cushioning.
- Range of Motion: Test your range of motion and make adjustments as needed to avoid discomfort.
Proper assembly and fitting are vital for a comfortable and visually stunning armor cosplay. By carefully connecting the pieces and making necessary adjustments, you can ensure that your armor looks great and feels comfortable to wear for extended periods.
| Key Point | Brief Description |
|---|---|
| 🔥 Thermoplastics | Rigid, reusable; requires heat for shaping. |
| 🛡️ EVA Foam | Flexible, lightweight, affordable. |
| 🛠️ Essential Tools | Heat gun, craft knife, cutting mat, metal ruler. |
| 🎨 Painting/Weathering | Acrylics, spray paints; dry brushing, washing. |
FAQ
Creating detailed armor for cosplay involves specific skills in crafting and design. This FAQ section addresses common questions to provide clear guidance.
▼
Worbla is often recommended for beginners due to its self-adhesive properties and reusability, allowing for mistakes to be easily corrected. It’s user-friendly and forgiving, making it a great starting point.
▼
To prevent EVA foam from bending, seal it with Plasti Dip or a similar sealant. This creates a protective layer. Reinforcing the foam with a rigid backing material can also provide extra support.
▼
While a household iron can provide heat, it’s not recommended for shaping thermoplastics. A heat gun offers more precise temperature control and even heating, essential for achieving the desired shapes without damaging the material.
▼
To create a smooth finish on EVA foam, start by sealing it with Plasti Dip or heat sealing. Then, apply several thin coats of primer, sanding lightly between each coat, to achieve a seamless surface.
▼
The best way to attach armor pieces together depends on the type of movement needed. Straps and buckles are great for larger, static pieces, while elastic provides flexibility for joints and moving parts. Contact cement can also be used for permanent bonds.
Conclusion
Mastering armor cosplay with thermoplastics and EVA foam involves a combination of skill, patience, and creativity. By understanding the properties of these materials, utilizing the right tools and techniques, and continuously practicing, you can create stunning and durable armor that brings your favorite characters to life.


