Mastering Worbla Armor: 2025 Guide To Cosplay Durability
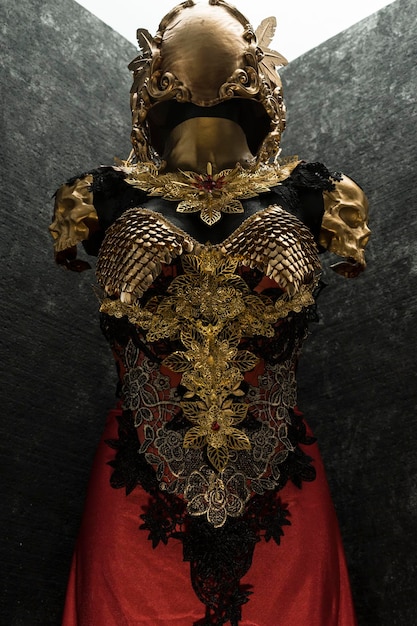
Mastering Worbla armor involves intricate heat forming, precise detailing, and advanced painting techniques to create durable, visually stunning cosplay pieces that stand the test of time and the rigors of conventions.
Delving into the world of cosplay craftsmanship, the creation of robust and visually striking armor remains a cornerstone for many enthusiasts. In 2025,
Mastering Worbla Armor: A 2025 Guide to Heat Forming and Painting Techniques for Durable Cosplay
continues to be an essential skill, allowing creators to translate intricate designs into wearable art that endures the demands of conventions and photoshoots.
Choosing Your Worbla: Understanding the 2025 Landscape
The landscape of thermoplastic materials has evolved, and Worbla remains a frontrunner due to its versatility and ease of use. Understanding the different types available in 2025 is the first step towards successful armor construction, as each variant offers unique properties for specific applications.
While classic Worbla’s Finest Art (WFA) is still widely used, newer formulations and specialized types have gained traction. These innovations often address common challenges like surface smoothness, adhesion, or flexibility, providing crafters with more tailored options.
Worbla Varieties for Cosplay Armor
The market now presents a broader spectrum of Worbla products, each suited for particular aspects of armor making. Selecting the right type can significantly impact the final look and durability of your piece.
- Black Worbla (Worbla’s Black Art): Ideal for a smoother finish, requiring less priming. It’s often preferred for pieces needing a pristine surface.
- Mesh Worbla (Worbla’s Mesh Art): Offers increased strength and tear resistance, perfect for structural components or larger pieces that need extra rigidity.
- TranspART (Worbla’s TranspART): A transparent thermoplastic, excellent for visors, light-up elements, or gem details, adding another dimension to your armor.
Beyond these, alternative brands and generic thermoplastics also offer varying degrees of workability and strength, though Worbla’s brand consistency often makes it a reliable choice for beginners and advanced crafters alike. Evaluating your project’s specific needs—whether it’s intricate details, large structural forms, or unique transparent elements—will guide your material selection.
Many crafters opt to combine Worbla types within a single project, using Mesh Art for a strong base, Finest Art for surface details, and Black Art for a smooth outer layer. This layered approach maximizes the strengths of each material, resulting in a more refined and resilient final product relevant to 2025 standards.
Advanced Heat Forming Techniques for Intricate Designs
Heat forming is the heart of Worbla craftsmanship, transforming flat sheets into three-dimensional, wearable armor. Beyond basic shaping, mastering advanced techniques allows for intricate details, seamless curves, and complex anatomical forms that elevate your cosplay.
The key to superior heat forming lies in understanding Worbla’s thermoplastic properties: it becomes pliable when heated and rigid when cooled. This allows for repeated reshaping, correcting errors, and achieving precise contours. Patience and controlled heat application are paramount.
Sculpting and Detailing with Heat
Achieving organic shapes and fine details requires more than just bending the material. Techniques like stretching, shrinking, and layering become critical for realism and structural integrity.
- Stretching and Draping: Gently stretch heated Worbla over forms or directly onto a body double for custom, fitted pieces. This minimizes seams and creates fluid lines.
- Pinching and Sculpting: Use fingers or sculpting tools to pinch, push, and pull heated Worbla into raised details, battle damage, or texture, adding depth and character.
- Layering for Dimension: Apply multiple layers of heated Worbla to build up thickness or create raised patterns, like filigree or etched designs. Each layer fuses seamlessly.
Utilizing a heat gun with variable temperature settings is crucial for precise control. Lower settings allow for subtle modifications, while higher settings quickly soften the material for major reshaping. Always work in a well-ventilated area and protect your hands with gloves.
Consider using templates and patterns as starting points, but be prepared to deviate and adapt as the Worbla responds to heat. The material’s forgiving nature allows for experimentation, making it an excellent medium for both planned designs and spontaneous creative additions. Achieving a smooth, consistent surface free of bubbles or unwanted textures requires practiced heating and gentle manipulation.
Reinforcement and Durability for Long-Lasting Cosplay
While Worbla is inherently robust, proper reinforcement is essential for armor that withstands the rigors of conventions, travel, and repeated wear. Investing time in structural integrity ensures your cosplay remains impressive for years.
Durability in Worbla armor isn’t just about the material itself; it’s about how it’s constructed. Adding internal supports, enhancing edge strength, and considering stress points are vital steps for longevity.

Structural Support and Edge Finishing
Thin Worbla can be brittle at stress points, requiring reinforcement. Along edges, a clean finish prevents fraying and improves overall resilience.
- Internal Bracing: For large or high-stress areas (e.g., shoulder pauldrons, breastplates), incorporate internal bracing using craft foam, PVC pipes, or additional layers of Worbla for added rigidity.
- Edge Rolling/Folding: Heat and gently roll or fold Worbla edges to create a smooth, rounded, and strong finish. This prevents sharp edges and improves comfort.
- Seam Reinforcement: When joining multiple Worbla pieces, ensure strong, fused seams. Consider adding strips of Worbla or mesh tape over the seams on the inside for extra strength.
The choice of understructure, often craft foam, plays a significant role in both shaping and reinforcing Worbla armor. A foam base provides a lightweight core, which the Worbla then encapsulates, creating a shell that is both rigid and slightly cushioned. This method is particularly effective for complex curves and hollow structures.
Maintaining consistent heat during reinforcement processes ensures that all added layers fuse correctly with the existing Worbla. Overheating can lead to thinning or bubbling, compromising strength. Proper cooling and setting time for each reinforced section are also crucial before moving on to the next step, preventing distortion and ensuring the new structure is solid.
Priming and Sanding Techniques for a Flawless Finish
Achieving a smooth, paint-ready surface on Worbla armor is perhaps the most time-consuming yet crucial step. Without proper priming and sanding, even the best paint job will look uneven and unprofessional, as Worbla’s inherent texture can show through.
The goal of priming and sanding is to create a perfectly smooth canvas, free of bumps, divots, or texture from the Worbla itself. This process requires patience, precision, and the right materials to ensure excellent paint adhesion and a professional finish.
Achieving a Mirror-Smooth Surface
Worbla, particularly Finest Art, has a slightly textured “orange peel” surface due to the wood fibers used. This texture must be smoothed out for a high-quality finish.
- Heat Reshaping: Before any priming, use a heat gun to gently smooth out any major lumps, bumps, or uneven spots. This is easier than sanding them away later.
- Base Priming: Apply several thin coats of a flexible primer, such as wood glue (e.g., Mod Podge), gesso, or spray-on filler primer. Each coat helps fill in the texture.
- Sanding Between Coats: Lightly sand each primer coat with progressively finer grit sandpaper (e.g., 220, 320, 400, 600) to achieve a smooth surface. Clean off dust thoroughly before the next coat.
The type of primer matters significantly. Flexible primers are preferred as they can flex with the Worbla without cracking. Automotive filler primer sprays can also work wonders for filling deep textures but might require more rigorous sanding. Experimentation on scrap pieces is advisable to find the primer that best suits your desired finish and budget.
The number of primer and sanding coats required will vary depending on the initial Worbla texture and desired smoothness. For a truly flawless, near-mirror finish, you might need 5-10 thin coats, with meticulous sanding in between. This dedication to preparation is what distinguishes amateur from professional cosplay armor.
Innovative Painting Approaches for Realistic Armor
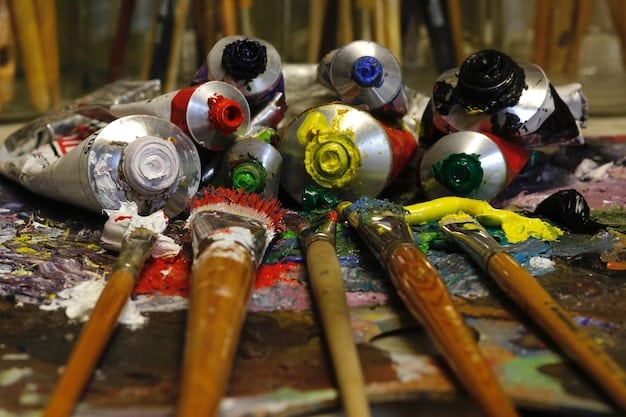
Once your Worbla armor is flawlessly primed, the painting stage transforms it from a base form into a lifelike piece of wearable art. Moving beyond simple base coats, innovative layering, weathering, and detailing techniques can create incredible realism and depth.
The secret to stunning armor painting lies not just in the colors themselves, but in the application methods and the illusion of age, wear, or material properties you create. This often means emulating metals, leather, or battle damage.
Layering, Weathering, and Specialty Finishes
Modern painting techniques for cosplay armor go far beyond basic acrylics, incorporating advanced concepts to achieve a realistic, worn, or magical look.
- Base Coat Application: Use an airbrush or high-quality spray paint for an even, smooth base coat. Choose colors that mimic the primary material (e.g., dark metallic for steel, brown for leather).
- Layering for Depth: Apply progressively lighter shades of your base color, focusing on raised areas to create highlights and simulate light reflection. Dry brushing is excellent for this.
- Weathering Effects: Use washes, dark glazes, and powders to simulate dirt, grime, rust, and battle damage. Sponge on black or brown paint for chipped effects.
- Specialty Finishes: Experiment with metallic waxes for realistic shine, iridescent paints for magical effects, or matte sealants for a muted, worn look.
Don’t be afraid to combine different types of paint—acrylics, enamels, and even specialty cosplay paints—to achieve specific textures and effects. A clear protective topcoat (matte, satin, or gloss) is crucial to protect your meticulous paint job from scratches, moisture, and UV damage, ensuring its longevity. This final step is often overlooked but critical for durability.
Study real-world references for the materials you’re trying to emulate. How does light reflect off polished steel versus dull, rusty iron? Understanding these nuances helps in applying paint effects authentically. Practicing these techniques on scrap pieces before committing to your final armor will refine your skills and build confidence.
Comfort and Wearability: The Often-Overlooked Details
A beautifully crafted Worbla armor piece loses its impact if it’s uncomfortable or impossible to wear for extended periods. Focusing on fit, weight distribution, and attachment methods is just as important as the aesthetics.
Cosplay is an experience, and a comfortable costume enhances that experience for the wearer. Poorly fitted armor can cause discomfort, restrict movement, or even lead to damage during wear.
Padding, Straps, and Mobility Solutions
Practical considerations are paramount for functional armor. Comfort, movement, and secure attachment prevent issues during conventions or photoshoots.
- Internal Padding: Line the inside of armor pieces with closed-cell foam (e.g., EVA foam, anti-fatigue mats) for cushioning, preventing chafing and distributing weight evenly.
- Secure Strapping: Use sturdy webbing, elastic, and buckles to secure armor pieces to the body. Ensure straps are adjustable, easy to fasten, and discreetly hidden.
- Articulation and Movement: For areas requiring movement (e.g., elbows, knees), design armor with articulated joints or use elastic sections instead of rigid Worbla.
Consider the total weight of your armor. While Worbla is lightweight, multiple layers and embellishments can add up. Distribute heavier pieces across the body, utilizing belts or harnesses to take weight off the shoulders. Breathability is also a factor; while Worbla isn’t breathable, designing gaps or vents where possible can help manage heat.
Always test fit your armor during construction. Don’t wait until the final stages to discover a piece is too tight, too loose, or restricts a necessary movement. Sitting, standing, and moving naturally will reveal any areas needing adjustment. A little extra time spent on fitting translates into a vastly superior wearing experience.
Storage and Maintenance: Preserving Your Worbla Creations
After investing countless hours into creating your Worbla armor, proper storage and maintenance are crucial for preserving its condition, ensuring it remains pristine for future conventions and displays. Neglect can lead to warping, damage, or degradation of the paint finish over time.
Worbla, being a thermoplastic, is susceptible to heat and pressure. Understanding how to store and care for your armor prevents costly repairs and extends its lifespan, maintaining your investment in craftsmanship.
Long-Term Preservation Techniques
From cleaning to climate control, intentional practices safeguard your armor from environmental damage and wear.
- Climate Control: Store Worbla armor in a cool, dry place, away from direct sunlight or extreme temperatures. Heat can cause warping, and humidity can affect paint or adhesives.
- Proper Support: Avoid stacking armor pieces on top of each other, as this can cause warping or paint transfer. Use garment bags, hangers (for breastplates), or custom-fit boxes with internal supports.
- Cleaning and Repair: Gently wipe down armor with a damp cloth to remove dust or smudges. For minor damage, small Worbla scraps and a heat gun can often mend cracks or dents.
- Protective Coating Reapplication: Over time, the clear protective topcoat might degrade. Periodically reapply a thin layer to refresh protection against wear and UV rays.
Even when not in use, armor pieces can shift or deform if not stored correctly. Investing in proper storage solutions, such as dedicated wardrobe boxes or display mannequins, can prevent sag and maintain the armor’s original form. This is especially important for large or anatomically contoured pieces.
Before putting any armor into long-term storage, ensure it is completely clean and dry to prevent mold or mildew growth. Detach any removable pieces, and if straps are prone to stretching, store them unfastened or loosely coiled. Proactive care ensures that your armored cosplay remains a stunning testament to your skill for years to come.
| Key Aspect | Brief Description |
|---|---|
| 🎨 Heat Forming | Precision with heat guns sculpts Worbla for intricate, durable shapes in cosplay armor. |
| 🛡️ Durability Hacks | Reinforce with foam cores and fused layers for long-lasting, convention-ready pieces. |
| ✨ Flawless Finish | Multi-step priming and sanding are crucial for paint adhesion and a sleek, professional look. |
| 🖌️ Pro Painting | Advanced layering, weathering, and sealants create realistic textures and protective surfaces. |
Frequently Asked Questions About Worbla Armor
The best method for smoothing Worbla involves multiple thin layers of a flexible primer, such as wood glue or gesso. Apply each coat evenly and allow it to dry completely. Between each coat, light sanding with fine-grit sandpaper (e.g., 220, 320, 400) is essential to eliminate texture and achieve a perfectly smooth surface before final painting. Dust thoroughly after each sanding session.
To enhance Worbla armor durability, consider incorporating internal bracing. Using craft foam (EVA foam) as a core before encasing it in Worbla adds lightweight rigidity. For high-stress areas or larger pieces, extra layers of Worbla’s Mesh Art can significantly increase strength and tear resistance. Fusing seams thoroughly and reinforcing edges also contributes to overall longevity and structural integrity for active wear.
Essential tools for Worbla armor include a high-quality heat gun with various temperature settings, a heat-resistant surface (like a silicone mat), a craft knife or sharp scissors, and safety gloves (cotton or leather). Additionally, a selection of sculpting tools (clay tools or silicone shapers) can help achieve intricate details. For finishing, various grits of sandpaper and a good quality primer are indispensable helpers.
Prevent Worbla armor from warping by storing it in a cool, dry environment, away from direct sunlight or extreme temperatures. Avoid stacking pieces directly on top of each other. Instead, use garment bags, hang them on suitable supports, or store them in custom-fitted boxes with internal bracing to maintain their shape. Ensure the armor is clean and dry before long-term storage to prevent moisture damage and maintain integrity.
While technically possible to apply spray paint directly to Worbla, it is highly unadvisable for a professional finish. Without priming, the inherent texture of the Worbla (especially Finest Art) will remain visible, and the paint may not adhere properly or chip easily. Priming creates a smooth, uniform surface essential for vibrant colors, smooth finishes, and long-lasting paint jobs that resist wear and tear during use.
Conclusion
Mastering Worbla Armor: A 2025 Guide to Heat Forming and Painting Techniques for Durable Cosplay is an evolving craft, blending artistic vision with technical precision. The journey from flat sheet to wearable masterpiece demands patience, an understanding of materials, and a commitment to refining techniques. By embracing advanced heat forming, strategic reinforcement, meticulous priming, and innovative painting, cosplayers can create armor that not only captivates the eye but also withstands the realities of extensive use. The longevity and visual impact of your Worbla creations are ultimately a testament to the dedication you put into every intricate detail, making your craftsmanship truly stand out.

